Your product photos are sitting in folders, looking great but doing nothing for your bottom line. Meanwhile, you need fresh ad creatives for your Meta campaigns, and hiring designers or learning complex editing software feels like overkill for what should be a simple task.
The good news? AI has completely changed how marketers transform basic product images into scroll-stopping advertisements.
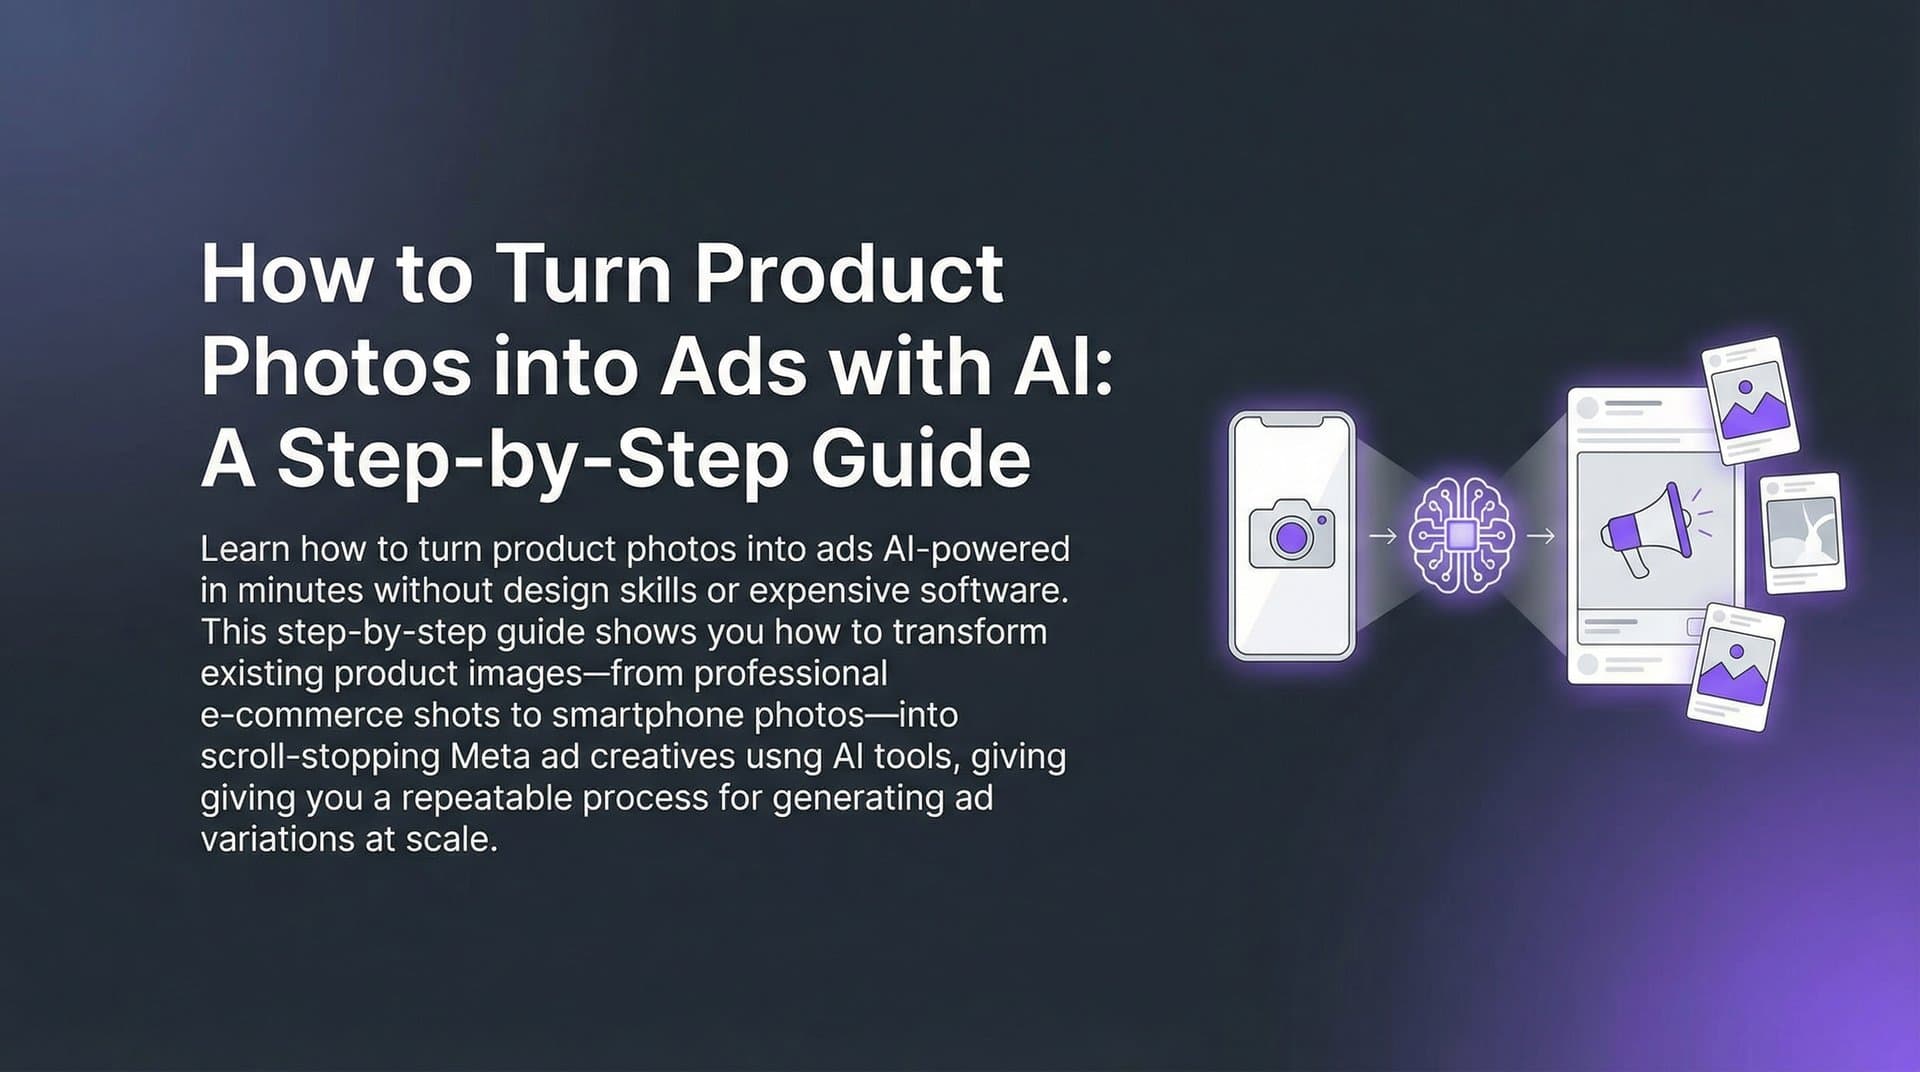
In this guide, you'll learn exactly how to take your existing product photos and convert them into professional ad creatives using AI tools. We'll cover everything from preparing your images for the best results to launching your finished ads on Meta.
Whether you have polished e-commerce photography or simple smartphone shots, these steps will help you create compelling ads without design skills, expensive software, or hours of editing time. By the end, you'll have a repeatable process for generating ad variations at scale.
Step 1: Audit and Organize Your Product Photo Library
Before you upload anything to an AI platform, you need to know what you're working with. Not all product photos translate equally well into ad creatives, and a quick audit saves you from discovering quality issues halfway through the process.
Start by reviewing your existing product photography with advertising in mind. Look for images with clean backgrounds, good lighting, and clear product visibility. Photos shot against white or neutral backgrounds typically perform better because AI tools can more easily manipulate or replace backgrounds without artifacts.
Multiple angles matter more than you might think. If you have front views, side views, lifestyle shots, and detail close-ups for the same product, you're giving the AI more creative options to work with. Each angle can become a different ad variation targeting different customer concerns.
Check your technical specs next. Meta recommends minimum dimensions of 1080x1080 pixels for feed ads, with higher resolutions preferred for stories and reels. Images below this threshold will either be rejected or display poorly on mobile devices. File formats should be JPG or PNG, with file sizes under 30MB for smooth uploading.
Create a simple folder structure that makes sense for your workflow. You might organize by product line, seasonal campaigns, or promotional themes. The goal is batch efficiency when you start generating ads at scale.
Flag any photos that need basic cleanup before AI processing. If an image has distracting elements, poor lighting, or resolution issues, address those first. Using an AI model for product photos can do remarkable things, but starting with quality source material produces dramatically better results.
Success indicator: You have a dedicated folder containing 5-10 high-quality product images, properly sized and organized, ready for transformation into ad creatives.
Step 2: Choose the Right AI Ad Generation Platform
Not all AI ad tools are created equal, and your choice here determines how smooth the rest of this process will be. The landscape has evolved quickly, so understanding what features actually matter will save you time and frustration.
Look for platforms that accept product URLs as input, not just manual image uploads. This feature dramatically speeds up the process because the AI can automatically pull product images, descriptions, and even pricing information directly from your website or e-commerce platform.
Multiple ad format outputs are essential. You don't just need static image ads. The best platforms generate video ads, UGC-style avatar content, and variations optimized for different placements like feed, stories, and reels. This versatility means one product photo can become dozens of different creative assets.
Integration with Meta is non-negotiable if you're running Facebook or Instagram campaigns. Standalone creative tools force you to download assets, then manually upload them to Meta Ads Manager, configure audiences, write copy, and set budgets. Full-stack platforms like AdStellar handle the entire workflow from creative generation through campaign launch without leaving the platform.
Bulk generation capabilities separate amateur tools from professional solutions. Can the platform create hundreds of ad combinations by mixing multiple creatives, headlines, copy variations, and audiences? If you're manually creating each variation, you're missing the entire point of AI automation.
Consider whether you need just creative generation or a complete Meta ads campaign management tool. If you're already comfortable with Meta Ads Manager and only need help with visuals, a creative-focused tool might suffice. But if you want AI to also analyze your historical performance, select winning elements, and build optimized campaigns, you need a platform with those capabilities built in.
Evaluate the editing workflow. Chat-based refinement lets you make adjustments conversationally rather than learning complex interfaces. If the AI generates something close but not quite right, can you simply tell it what to change?
Pricing matters, but context matters more. A $49/month tool that saves you 20 hours of design work monthly is a bargain. A free tool that produces mediocre results requiring extensive manual fixes costs you more in wasted time.
Success indicator: You've selected a platform that matches your workflow needs and created your account with proper Meta integration configured.
Step 3: Upload Your Product Photos and Set Creative Parameters
This is where your organized photo library pays off. The setup you do here determines the quality and consistency of every ad the AI generates, so take the time to get it right.
Most modern AI platforms offer two input methods. You can directly upload your curated product photos, or you can simply paste a product URL and let the AI pull images automatically. The URL method is faster for e-commerce businesses because it also captures product descriptions, features, and pricing that inform the generated copy.
If you're uploading manually, batch upload your organized folders to keep products grouped logically. This organization carries through to your generated ads, making it easier to track which creatives belong to which campaigns.
Setting brand guidelines upfront ensures consistency across all your AI-generated ads. Define your brand colors using hex codes so the AI incorporates them into backgrounds, text overlays, and design elements. Specify approved fonts if you have brand typography standards.
Tone of voice matters enormously for the copy AI generates. Are you playful and casual, or professional and authoritative? Do you use emojis or avoid them? Should the copy be benefit-focused or feature-focused? The more specific your guidelines, the less editing you'll need later.
Select your target ad formats and aspect ratios based on where you plan to run campaigns. Feed ads typically use 1:1 square format, stories need 9:16 vertical, and reels perform best with vertical video. Generate all three if you're running multi-placement campaigns, or focus on your primary placement to start.
Writing effective prompts or selecting creative directions gives the AI context about your campaign goals. Are you launching a new product and need awareness-focused creatives? Running a sale and need urgency-driven messaging? Targeting repeat customers with upsell offers? This context shapes everything from visual style to headline approach.
Some platforms let you specify competitive positioning. If you're competing against established brands, you might prompt the AI to emphasize your differentiators. If you're the market leader, you might focus on reinforcing trust and authority.
Preview settings before generating to catch any misconfigurations. Check that image resolution matches your requirements, brand colors are correctly applied, and selected formats align with your campaign placements.
Success indicator: Your first batch of product photos is uploaded with brand guidelines configured, creative directions specified, and output formats selected for your target placements.
Step 4: Generate and Refine Your AI Ad Creatives
Hit generate and watch your product photos transform into polished ad creatives. The first batch rarely requires zero editing, but the refinement process is where you teach the AI what works for your brand.
Review the initial outputs with a critical eye. The AI typically generates multiple variations from each product photo, experimenting with different backgrounds, text placements, color schemes, and visual styles. Each variation tests a different creative hypothesis.
Look for patterns in what the AI produces. Does it consistently place products against lifestyle backgrounds or minimalist settings? Are headlines benefit-driven or feature-focused? Understanding these patterns helps you guide future generations more effectively.
Chat-based editing makes refinement conversational. Instead of navigating complex menus, you can simply tell the AI what to change. "Make the background darker," "move the headline to the top," "emphasize the discount more prominently." The AI interprets your intent and regenerates accordingly.
Create multiple headline and copy variations to test alongside your visuals. The same product image can perform dramatically differently depending on whether the headline focuses on price, quality, exclusivity, or problem-solving. Generate at least three headline approaches for each creative.
Balance quantity with quality. It's tempting to generate hundreds of variations immediately, but you'll get better results by generating smaller batches, reviewing carefully, refining your parameters, then scaling up. Think of this as calibrating the AI to your specific brand and audience.
Pay attention to text readability on mobile. Most Meta ads are viewed on smartphones, so text overlays need sufficient contrast and size to read easily on small screens. If you're squinting to read headlines on your computer monitor, they'll be illegible on mobile.
Test different visual approaches for the same product. One variation might show the product in use, another might focus on packaging, and a third might highlight a specific feature. This diversity helps you discover which angles resonate most with your audience. An ecommerce product video generator can also help you create dynamic video variations from your static images.
Save variations that feel promising even if they're not perfect yet. You can always refine further, but deleting a creative direction that might work with minor tweaks wastes the AI's exploratory work.
Success indicator: You have 3-5 polished ad creatives ready for each product, with multiple headline and copy variations that test different messaging approaches.
Step 5: Build Ad Variations at Scale with Bulk Generation
This is where AI transforms from a helpful tool into a competitive advantage. Bulk generation lets you create hundreds of ad combinations in minutes, testing variables that would take days to set up manually.
The concept is simple but powerful. Take your 3-5 creatives per product, combine them with multiple headlines, different copy variations, and various audience targeting options. The AI generates every possible combination automatically.
Start by defining your variable sets. You might have five product images, three headline approaches, four copy variations, and two audience segments. That's 120 unique ad combinations from a single product. Multiply that across your product line, and you're testing at a scale impossible with manual creation.
Platforms with true Facebook ads bulk campaign creation capabilities let you mix and match at both the ad set and ad level. This means you can test different audiences seeing the same creative, or the same audience seeing different creatives, or every combination simultaneously. The granularity helps you isolate what actually drives performance.
Organize your variations logically before launching. Use consistent naming conventions that identify the product, creative approach, headline type, and audience. Something like "Product_A_Lifestyle_Benefit_Headline_Audience_1" tells you exactly what you're looking at in performance reports.
This organization becomes critical when you're analyzing results across hundreds of variations. Without clear naming, you'll struggle to identify patterns in what works. With proper structure, you can quickly see that lifestyle images outperform product-only shots, or that benefit-focused headlines beat feature-focused ones. Following Meta ads campaign naming conventions from the start saves headaches later.
Consider budget allocation across your variations. You don't need to spend equally on every combination. Start with smaller budgets to identify winners, then scale spending on top performers while pausing underperformers.
Set up variation groups that test specific hypotheses. One group might test background styles while keeping headlines constant. Another might test headline approaches while using the same creative. This structured testing reveals what actually moves the needle versus what's just noise.
Don't overwhelm yourself with too many simultaneous tests. It's better to run focused experiments with clear learnings than to launch everything at once and struggle to interpret the data. Start with your top products and most important audience segments.
Success indicator: You have a complete set of ad variations organized with clear naming conventions, ready to launch with proper budget allocation and testing structure in place.
Step 6: Launch Your Ads to Meta and Set Up Performance Tracking
Your AI-generated creatives are ready. Now it's time to get them in front of actual customers and set up the tracking that turns data into insights.
Connect your Meta ad account if you haven't already. Full-stack platforms handle this integration seamlessly, pulling in your existing campaign structure, audiences, and conversion events. You're not starting from scratch; you're building on what you already know works.
Select your campaign objective based on your business goals. Are you driving website traffic, generating leads, or optimizing for purchases? Your objective determines how Meta's algorithm optimizes delivery, so align it with what you actually want to achieve.
Configure your audiences thoughtfully. If you're testing new creatives, start with audiences you already know convert well. This isolates creative performance from audience quality. Once you identify winning creatives, you can expand to new audience segments with confidence.
Set budgets that give each variation enough delivery to generate meaningful data. Spending $5 per day across 50 variations means each gets minimal exposure and you'll struggle to identify statistical significance. Better to test fewer variations with adequate budgets than spread yourself too thin.
Choose your placements based on where your audience actually spends time. Automatic placements let Meta optimize delivery, but if you know your audience primarily engages on Instagram Stories, you can leverage Instagram ads campaign automation to focus there. Your ad formats should already match your chosen placements from Step 3.
Goal-based scoring transforms raw metrics into actionable insights. Set your target benchmarks: what ROAS makes a campaign profitable? What CPA is acceptable? What CTR indicates strong creative engagement? AI platforms score every creative, headline, and audience combination against these goals, surfacing winners automatically.
Configure conversion tracking properly or none of this matters. Install the Meta Pixel on your website, set up conversion events for key actions (add to cart, purchase, lead submission), and verify everything fires correctly before launching campaigns. Test purchases or conversions to confirm data flows properly.
For advanced attribution, consider integrating tools like Cometly that provide more granular tracking across the customer journey. This becomes essential when you're running multiple campaigns and need to understand which touchpoints actually drive conversions.
Set up automated reporting so you're not manually checking performance constantly. Daily or weekly reports showing top performers, budget pacing, and goal achievement keep you informed without requiring constant dashboard monitoring.
Success indicator: Your ads are live on Meta with proper audience targeting, budgets allocated strategically, conversion tracking verified, and goal-based scoring configured to surface winning combinations automatically.
Step 7: Analyze Results and Build Your Winners Library
Data without analysis is just noise. This final step transforms your campaign results into institutional knowledge that improves every future campaign.
Start by reviewing performance against your established goals. Which product photo transformations exceeded your ROAS targets? Which fell short? Look beyond surface-level metrics to understand why certain creatives worked.
AI-powered leaderboards rank your creatives, headlines, copy, audiences, and landing pages by actual performance metrics. A robust Meta ads campaign scoring system ensures this ranking isn't based on opinions or assumptions—it's based on real customer behavior and conversion data.
Identify patterns in your top performers. Do lifestyle images consistently outperform product-only shots? Do benefit-focused headlines beat feature-focused ones? Does your audience respond better to urgency messaging or value propositions? These patterns become your creative playbook.
Save your top performers to a Winners Hub or similar library. The biggest waste in advertising is losing track of what works. When you launch your next campaign, you should be able to instantly access creatives, headlines, and audiences that have proven themselves with real performance data.
Document the context around your winners. A creative that crushes it during a holiday sale might flop during regular periods. Note the timing, audience, offer, and any other factors that contributed to success. This context prevents you from misapplying winning elements in the wrong situations.
Create a feedback loop where each campaign teaches the AI more about your specific products and audience. Platforms that learn from historical performance get smarter over time, automatically selecting elements similar to past winners and avoiding approaches that historically underperform. This is where campaign learning Facebook ads automation truly shines.
Look for unexpected insights. Sometimes the creative you thought would flop becomes your top performer. Sometimes your target audience responds better to messaging you didn't expect. Stay open to data that challenges your assumptions.
Review underperformers to understand what doesn't work. Failed tests are valuable learning opportunities. If bright, bold backgrounds consistently underperform compared to minimalist ones, that's actionable intelligence for future campaigns.
Schedule regular performance reviews rather than obsessively checking daily. Give campaigns enough time to gather meaningful data before making decisions. Weekly reviews strike a good balance between staying informed and avoiding reactive changes based on insufficient data.
Share learnings across your team. If you discover that UGC-style creatives outperform polished product photography by 40%, that insight should inform everyone's creative approach. Build a shared knowledge base that captures these discoveries.
Success indicator: You have documented winning creative patterns, saved top performers to your Winners Library with proper context, and established a regular review process that turns campaign data into continuous improvement.
Your Next Steps: From Product Photos to Profitable Ads
Transforming product photos into high-performing ads no longer requires design expertise or expensive production budgets. With the right AI platform and this seven-step process, you can go from static product images to live Meta campaigns in hours instead of days.
Quick checklist before you start: audit your product photo library for quality images with proper resolution and clean backgrounds. Choose an AI platform with bulk generation capabilities and Meta integration. Set your brand parameters once for consistent output across all generated creatives. Generate variations and refine them using chat-based editing until they match your standards. Launch at scale with proper tracking and goal-based scoring configured. Then save winners to build institutional knowledge that improves every future campaign.
The marketers seeing the best results treat this as an ongoing system rather than a one-time project. Each campaign teaches the AI more about what works for your specific products and audience. Your Winners Library grows with every test, giving you a constantly expanding arsenal of proven creative approaches.
The efficiency gains compound over time. Your first campaign might take a few hours to set up as you learn the workflow. Your tenth campaign launches in minutes because you're working from proven templates, reusing winning elements, and letting AI handle the heavy lifting.
Think about the math. If you're currently spending 10 hours per week creating ad creatives manually, that's 520 hours per year. AI automation can reduce that to 1-2 hours weekly, freeing up 450+ hours annually for strategy, optimization, and growth initiatives that actually move your business forward.
Start small and scale what works. Pick your top-selling product and work through these seven steps today. Once you've proven the workflow with one product, expanding to your entire catalog becomes straightforward.
Ready to transform your advertising strategy? Start Free Trial With AdStellar and be among the first to launch and scale your ad campaigns 10× faster with our intelligent platform that automatically builds and tests winning ads based on real performance data.