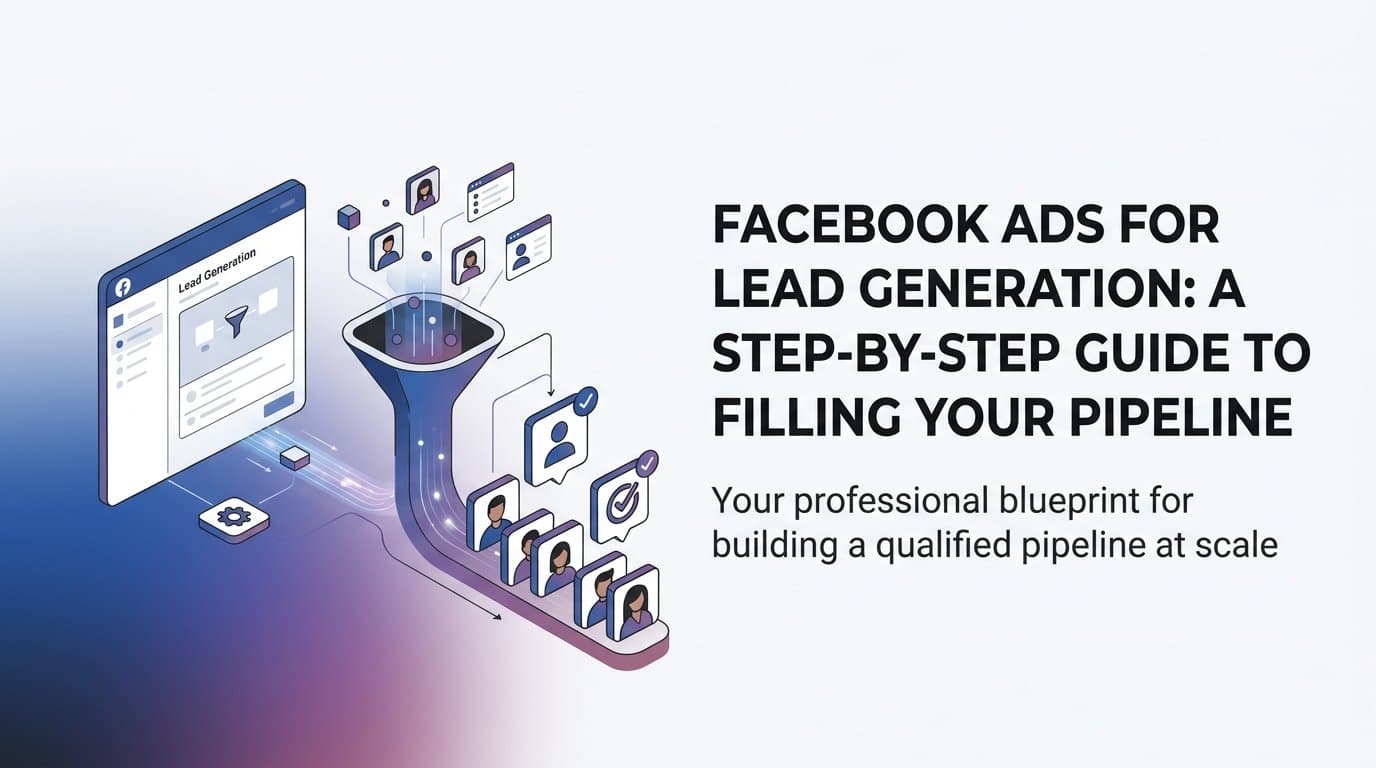
Facebook ads for lead generation remain one of the most cost-effective ways to build a pipeline of qualified prospects at scale. Meta's platforms give advertisers targeting capabilities that are genuinely unmatched, with the ability to reach specific audiences based on interests, behaviors, demographics, and existing customer data. But the gap between "running Facebook ads" and "running Facebook ads that actually fill your pipeline" is significant.
Most businesses waste budget because they skip the fundamentals. They launch campaigns without a clear offer, target audiences that are too broad, or run creatives that blend into the feed. The result is a high cost per lead and a pipeline full of people who never convert into real opportunities.
This guide walks you through every step of building a Facebook lead generation campaign that works. From choosing the right campaign objective and defining your audience, to writing ad copy that converts and optimizing based on real performance data. Whether you are running lead gen for a B2B SaaS product, a local service business, or an e-commerce brand building an email list, the same core principles apply.
Each step is designed to be actionable so you can move from zero to a live, optimized campaign without guesswork. You will also learn how tools like AdStellar can compress hours of manual work into minutes by generating creatives, building campaigns, and surfacing winners automatically.
By the end, you will have a repeatable system for generating leads on Facebook rather than a one-off campaign you hope performs.
Step 1: Choose the Right Campaign Objective and Set Up Your Lead Capture Method
The very first decision you make in Ads Manager shapes everything that follows. Choose the wrong objective and you will pay more for leads, reach the wrong people, and wonder why performance never improves. Get it right and Meta's algorithm starts working in your favor from day one.
Meta offers a dedicated Leads objective that tells the algorithm to find users most likely to complete a lead form. Within this objective, you have two capture methods to choose from: Instant Forms (native to Meta) or a website conversion tracked via the Meta Pixel or Conversions API.
Instant Forms are lead forms that open directly inside Facebook or Instagram without sending the user to an external page. They pre-populate fields with the user's profile data, which lowers friction and typically drives higher lead volume at a lower cost per lead. The trade-off is lead quality. Because it is so easy to submit, you may collect contacts who were not fully committed to the offer.
Landing page campaigns using the Conversions objective send users to your website. There is more friction involved, which naturally filters out lower-intent users. The leads you capture tend to be more qualified, but you need a well-optimized landing page and a correctly installed Pixel or Conversions API to make this work.
When setting up Instant Forms, you will choose between a "More Volume" form type (fewer fields, faster submission) and a "Higher Intent" form type (adds a review screen before submission). For most lead gen campaigns, start with Higher Intent to improve downstream quality. Keep your form questions to the essentials: name, email, and one qualifying question at most. You are also required to include a link to your privacy policy, so have that URL ready.
For landing page campaigns, confirm your Meta Pixel is firing on the thank-you page or that your Conversions API is sending the correct event. Run a test conversion before launching to verify the signal is reaching Meta. A broken tracking setup means the algorithm has no data to optimize against.
Success indicator: Your campaign is live, your form or Pixel is firing correctly, and you have submitted a test lead to confirm data is flowing through properly.
Step 2: Define and Build Your Target Audience
Before you open Ads Manager and start building audiences, take ten minutes to write down your ideal customer profile. Who specifically are you trying to reach? What is their job title, industry, or life situation? What problem are they trying to solve? The clearer your picture, the more precise your targeting becomes.
For cold audiences, Meta gives you three main levers to work with: interests, demographics, and behaviors. The mistake most advertisers make is stacking broad interest categories and calling it a day. Instead, layer your targeting deliberately. If you are targeting small business owners interested in marketing software, combine that interest with behavioral signals like "small business owners" under Facebook's detailed targeting categories and layer in relevant job title demographics where available.
Avoid audiences under 500,000 for cold traffic. Too narrow and Meta cannot find enough users to exit the learning phase efficiently. Too broad and you are paying to reach people who have no context for your offer. A well-defined cold audience typically sits between 500,000 and three million users depending on your market.
Custom Audiences are where lead gen campaigns often find their best results. Upload your existing customer list to create an audience of people who already know and trust you. Build audiences from website visitors, video viewers, and people who have previously engaged with your lead forms. These warm audiences convert at a lower cost per lead because the trust barrier is already lower.
Lookalike Audiences let you take your best customers or highest-quality leads and ask Meta to find new users who share similar characteristics. Build your lookalike from a seed audience of converted customers rather than all leads, since not every lead becomes a customer. A one to two percent lookalike from a strong seed audience is often the most efficient cold traffic source in a lead gen campaign.
Use your Custom Audiences to exclude existing customers and already-converted leads from your cold campaigns. There is no reason to pay to acquire someone you already have in your pipeline.
Success indicator: You have at least two audience sets ready before launch: one warm Custom Audience and one cold Lookalike Audience built from your best customers or leads.
Step 3: Create Ad Creatives That Stop the Scroll and Drive Action
Here is the truth most advertisers learn the hard way: creative is the single biggest lever in Facebook lead gen performance. You can have perfect targeting and a well-structured campaign, but if your ad blends into the feed, nobody clicks. Nobody converts. Budget disappears.
For lead generation specifically, your creative has one job: communicate a clear value exchange. The user needs to understand what they are getting in return for handing over their contact information. Offers that consistently perform well include free guides, demos, consultations, trials, and discounts. The more specific and tangible the offer, the better your creative will perform.
Three creative formats work particularly well for lead gen campaigns:
Static image ads are fast to produce, easy to test, and often outperform video in direct response contexts. A clean image with a bold headline and a clear offer can drive strong results without any video production involved.
Short-form video ads capture attention in the first two to three seconds and give you more room to explain the offer. Keep them under thirty seconds and lead with the hook immediately. Do not build up to the point.
UGC-style content performs well because it feels native to the feed. When an ad looks like a regular post rather than a polished brand asset, it tends to get more engagement and lower CPL. This format works especially well for service businesses and SaaS products where a relatable, conversational tone builds trust quickly.
Your ad copy needs three elements: a clear problem statement that resonates with your audience, the specific offer you are making, and a direct call to action that tells them exactly what to do next. Avoid vague CTAs like "Learn More." Use specific language: "Download the free guide," "Book your free consultation," or "Claim your trial."
The biggest mistake in lead gen creative is launching a single ad and hoping it wins. You need to test multiple creative angles simultaneously to find out what actually resonates with your audience. This is where the production bottleneck usually kills momentum.
AdStellar's AI Ad Creative feature removes that bottleneck entirely. You can generate image ads, video ads, and UGC-style avatar content directly from a product URL, without designers, video editors, or actors. You can also clone competitor ads from the Meta Ad Library and refine any creative with chat-based editing. The result is multiple distinct creative variations ready to test in a fraction of the time it would take to brief and produce them manually.
Success indicator: You have at least three distinct creative variations ready per ad set, each testing a different angle, format, or offer framing.
Step 4: Build and Launch Your Campaign Structure
A clean campaign structure makes optimization dramatically easier. When everything is organized logically, you can quickly identify what is working, what is not, and where to move budget. A messy structure where creatives and audiences are mixed together makes it nearly impossible to draw clean conclusions from your data.
For a lead gen campaign, start with this structure: one campaign, two to three ad sets, and three creatives per ad set. Each ad set should represent a distinct audience segment so you can compare performance cleanly. Keep your creatives consistent across ad sets in the early testing phase so you are isolating the audience variable rather than mixing too many changes at once.
Budget allocation comes down to a choice between Campaign Budget Optimization (CBO) and Ad Set Budget Optimization (ABO). CBO sets a single budget at the campaign level and lets Meta's algorithm distribute spend toward the best-performing ad sets automatically. This is generally the better starting point for lead gen because it gives the algorithm flexibility to find efficiency. ABO gives you manual control over each ad set's budget, which is useful once you have identified clear winners and want to control spend precisely.
For bid strategy, start with Lowest Cost to let Meta find leads at the most efficient price point while the campaign is in the learning phase. Once you have enough data and a clear sense of your target CPL, you can switch to Cost Cap to maintain tighter control over what you pay per lead.
Building this structure manually takes time, especially when you are mixing multiple creatives, headlines, and audience combinations. AdStellar's AI Campaign Builder analyzes your past campaign performance, ranks every creative, headline, and audience by how they have performed historically, and builds complete Meta campaigns in minutes. Every decision is explained with transparent reasoning so you understand the strategy behind the structure, not just the output.
For advertisers who want to test at scale from day one, AdStellar's Bulk Ad Launch feature creates hundreds of ad variations by mixing creatives, headlines, audiences, and copy at both the ad set and ad level. It then generates every combination and launches them to Meta in clicks rather than hours. What would take a team of people a full day to build manually gets done in minutes.
Success indicator: Your campaign is live with a clean structure, your budget is active, and your ads are either in review or already delivering.
Step 5: Track Performance and Identify What Is Actually Working
Once your campaign is live, resist the urge to make changes in the first forty-eight hours. The learning phase requires data before the algorithm can optimize effectively. Your job in the first few days is to observe, not intervene.
The core metrics for lead gen campaigns are cost per lead (CPL), total lead volume, and conversion rate from lead to opportunity. CPL tells you how efficiently you are acquiring contacts. Lead volume tells you whether your campaign is reaching enough people. Conversion rate from lead to opportunity tells you whether the leads you are generating are actually qualified.
Set up custom columns in Ads Manager to surface these metrics prominently. By default, Ads Manager shows you a lot of data that is not directly relevant to lead gen performance. Building a custom column view that puts CPL, lead volume, and CTR front and center saves time every time you check in on the campaign.
Here is where many advertisers make a costly mistake: they optimize purely for the lowest CPL without considering lead quality. A broad audience might generate leads at a very low cost, but if those leads never convert downstream, you have wasted budget. Always evaluate CPL alongside what happens to those leads in your CRM. If you can feed lead quality data back to Meta via offline conversions or the Conversions API, the algorithm will optimize toward the leads most likely to become real opportunities.
AdStellar's AI Insights feature takes performance analysis further by building leaderboards that rank your creatives, headlines, copy, audiences, and landing pages by real metrics including ROAS, CPA, and CTR. You set your target goals and benchmarks, and the AI scores everything against them automatically. Instead of manually comparing rows in Ads Manager, you can instantly see which combinations are winning and which are dragging down performance.
Success indicator: Within the first seven days, you can clearly identify your top-performing creative and audience combination based on CPL and lead quality, not just impressions or clicks.
Step 6: Optimize, Scale Winners, and Cut What Is Not Working
Optimization is where the real money is made. The difference between a campaign that breaks even and one that consistently fills your pipeline is what you do with the data once it starts coming in.
Use a structured timeline for your evaluation decisions. At day three, check whether your ads have exited the learning phase and whether CPL is directionally reasonable. Do not pause anything yet unless spend is clearly out of control. At day seven, you should have enough data to identify your top-performing ad set and creative combination. Pause the lowest performers and reallocate budget toward what is working. At day fourteen, you have a clearer picture of sustainable CPL and can begin scaling with confidence.
When scaling a winning ad set, avoid doubling the budget overnight. Increasing budget by more than twenty percent at a time typically resets the learning phase and disrupts performance. Instead, increase gradually or duplicate the winning ad set and scale the duplicate separately while keeping the original running at its proven budget level.
Knowing when to pause a creative versus giving it more time is one of the trickier judgment calls in optimization. If a creative has spent enough to generate meaningful data (typically at least fifty impressions of the conversion event) and CPL is significantly above your target, pause it. If it has not yet had sufficient spend, give it more time before drawing conclusions.
Ad fatigue is a real issue in lead gen campaigns that run to the same audience over extended periods. When frequency climbs and CPL starts rising, it is usually a signal that your audience has seen your creative too many times. Refreshing creatives and rotating offers keeps performance stable without requiring a full campaign rebuild.
AdStellar's Winners Hub makes the scaling and reuse process much faster. Your best-performing creatives, headlines, audiences, and more are all consolidated in one place with real performance data attached. When you are ready to launch your next lead gen campaign, you can select proven winners directly from the hub and add them instantly rather than starting from scratch.
Success indicator: You have a documented list of winning creatives and audiences you can reuse, and your CPL is trending downward week over week as you cut underperformers and scale what works.
Your Repeatable Lead Generation System
Building a Facebook lead generation system that consistently fills your pipeline comes down to six repeatable steps: choosing the right objective, building precise audiences, creating compelling ad content, launching with a clean campaign structure, tracking the metrics that matter, and scaling what works while cutting what does not.
The biggest difference between campaigns that generate cheap, qualified leads and campaigns that burn budget is how quickly you can test, identify winners, and act on the data. Every day spent guessing instead of optimizing is budget you will not get back.
That is exactly where AdStellar compresses the timeline. Instead of spending days building creatives, manually constructing campaigns, and digging through Ads Manager for insights, AdStellar generates your creatives, builds your campaigns, and surfaces your winners automatically. The AI Campaign Builder explains its reasoning. The Bulk Ad Launch handles hundreds of variations in minutes. The AI Insights leaderboards show you exactly what is working. And the Winners Hub keeps your best performers ready to reuse.
Start with one campaign, one offer, and two audience sets. Get data. Find your first winner. Then scale it. Use this guide as your checklist every time you launch a new lead gen campaign and you will have a system that compounds over time rather than a one-off experiment you hope performs.
Ready to put this into action? Start Free Trial With AdStellar and be among the first to launch and scale your ad campaigns faster with an intelligent platform that automatically builds and tests winning ads based on real performance data.