Alright, let's get down to business. Before we jump into the nitty-gritty of creating and installing the Meta Pixel, we need to talk about why this little piece of code is the most critical tool in your advertising arsenal.
Think of the Meta Pixel as the central nervous system for your campaigns. It’s a small snippet of JavaScript that you place on your website, and its job is to create a powerful feedback loop between what happens on your site and what your ad account sees.
This isn't just about counting clicks. The real magic happens when you track what people do after they land on your site. Did they check out a specific product? Add something to their cart? Did they actually buy anything? Each one of those actions is a priceless signal that teaches Meta's algorithm what a valuable customer looks like for your business.
Without it, you’re flying blind. You can't accurately measure your return on ad spend (ROAS), and you certainly can't optimize for the actions that actually make you money.
The Evolution of Ad Measurement
Tracking pixels aren't a new concept, but their importance has exploded for a reason. When Meta unified its pixel back in 2015, it was a massive leap forward for performance marketers. It replaced a clunky collection of older tracking codes and finally made measuring ad success simple and powerful.
The impact was immediate. Fast forward to 2024, and a staggering 93% of social media marketers rely on it to shape their strategies. You can dig into more stats like this over at Hootsuite.
The Meta Pixel doesn’t just track data; it learns from it. Every event fired helps the algorithm understand your ideal customer profile, making your future ad spend progressively more efficient and targeted.
This constant learning is what unlocks Meta's most powerful advertising features. It’s the engine behind:
- Retargeting Campaigns: Serving ads to people who visited key pages or bailed on their shopping carts.
- Lookalike Audiences: Finding brand-new customers who share the same traits as your best existing ones.
- Conversion Optimization: Telling Meta to show your ads to people who are most likely to take a specific action, like completing a purchase.
To put it simply, here’s a quick breakdown of how this all comes together.
Why the Meta Pixel Is a Game-Changer for Ads
This table sums up the core benefits you unlock by getting your Meta Pixel set up correctly. It's the difference between guessing and knowing.
| Core Function | Impact on Your Advertising | Example Use Case |
|---|---|---|
| Conversion Tracking | Measure the direct impact of your ads on sales, leads, and sign-ups. | An e-commerce store tracks every purchase that originated from a specific Instagram ad, calculating the exact ROAS. |
| Audience Building | Create hyper-targeted custom audiences based on website visitor behavior. | A SaaS company builds an audience of everyone who visited their pricing page but didn't sign up for a trial, then retargets them with a special offer. |
| Ad Optimization | Feed the algorithm real-time data so it can find more people likely to convert. | A local service business optimizes its campaigns for "Lead" events, and Meta automatically shows the ads to users with a history of filling out forms. |
Ultimately, learning how to set up the Meta Pixel is less about messing with code and more about building an intelligent data asset for your business. It’s the first real step in turning your campaigns from simple traffic drivers into predictable, revenue-generating machines. This guide will walk you through the entire process, making sure you have everything you need to make it happen.
Creating And Installing Your First Meta Pixel
Alright, now that you know why the Meta Pixel is so critical, it’s time to get your hands dirty and put it to work. The good news is that creating the pixel itself is incredibly simple. You'll do it all inside the Meta Events Manager, which is your command center for all tracking data.
Head over to the Events Manager and look for the option to connect a new data source. Meta will prompt you to choose "Web" as your source, give your new dataset a name (this is just what they call the pixel's container now), and that's it. The pixel is created. The next step—installation—is where the real work begins.
This whole process really boils down to three key stages.
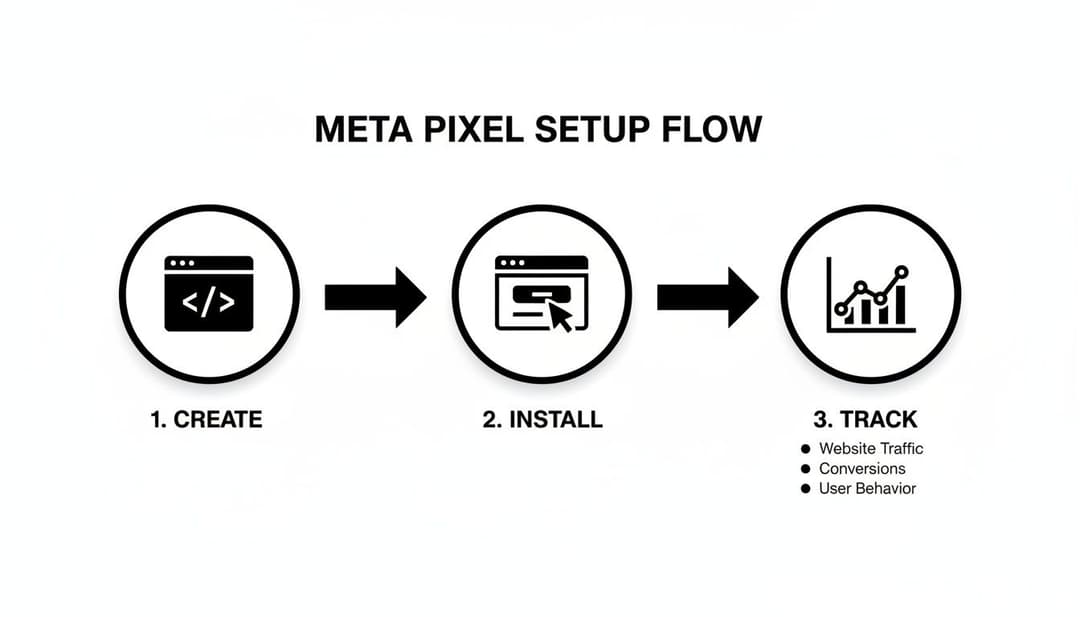
As you can see, you create the pixel, get it onto your website, and then start telling it what specific actions to track. Simple enough.
Choosing Your Installation Method
Meta gives you three main ways to get the pixel on your site. The right one for you really depends on your tech stack and how comfortable you are with code.
- Partner Integration: This is your no-code, easy button. If you're on a major platform like Shopify, WooCommerce, or WordPress, this is the way to go. Meta has pre-built connections that do all the heavy lifting.
- Manual Installation: For custom-coded sites or for anyone who wants total control, you can grab the raw JavaScript code and place it directly into your site’s header.
- Google Tag Manager (GTM): Honestly, this is the method most pros use. GTM gives you the ultimate flexibility to manage all your marketing tags in one spot without having to bother a developer for every little change.
Manual Code Installation for Custom Websites
If you have a custom-built website or just prefer to handle things yourself, the manual route is straightforward. After creating your pixel in Events Manager, Meta will generate a snippet of code for you to copy.
Pro Tip: This base code needs to be pasted into the
<head>section of your website's HTML, right before the closing</head>tag. On most sites, there's a global header file, so you only have to add it once to make it active everywhere.
Placing it here ensures the pixel loads on every single page of your site. This is what allows it to automatically track PageView events and provides the foundation for all other custom events you'll set up later.
Using Partner Integrations Like Shopify or WordPress
Running your site on a popular CMS? The partner integration is your best friend. This method turns a potentially technical task into a simple copy-and-paste job. You don't need to touch any code; you just need your Pixel ID.
On a platform like Shopify, it’s a breeze:
- Go to your "Online Store" sales channel, then click on "Preferences."
- Find the "Facebook Pixel" section.
- Paste your Pixel ID into the box and hit save.
That’s it. Shopify handles the rest. The process is just as easy on WooCommerce, where an official plugin connects your store and can even sync your product catalog. These integrations are designed to be foolproof and often set up standard e-commerce events like AddToCart and Purchase automatically.
The Google Tag Manager Method
For marketers who want granular control without having to edit website code, Google Tag Manager is the undisputed champion. It acts as a container for all your tracking scripts, allowing you to deploy and manage your Meta Pixel from a clean, separate dashboard.
The setup is pretty simple. You'll use a pre-built "Facebook Pixel" tag template from GTM's Community Gallery. Just add the template, create a new tag with it, and pop in your Pixel ID.
Where GTM really shines is with complex event tracking. Want to fire an event only when someone clicks a specific "Request a Demo" button or watches 75% of an embedded video? You can set up triggers for that in GTM in minutes, all without touching your site's source code. It’s this flexibility that makes it the preferred method for 9 out of 10 experienced marketers I know. It keeps your website's code clean and your marketing agile.
Configuring Events for Deeper Customer Insights
Okay, so your Meta Pixel is installed and firing. That’s the foundation, but right now, it’s only tracking basic PageView events. It's a great start, but the real magic happens when you teach the pixel what specific actions on your site actually matter to your business. This is where event configuration comes in.
Think of it this way: the base Pixel is like a security camera recording everyone who walks into your store. Event tracking is like telling that camera to flag whenever someone picks up an item, heads to the checkout counter, or actually buys something. Those are the signals that turn your ad campaigns from guesswork into a data-driven machine.
Unlocking Standard Events with the Event Setup Tool
Meta already knows the most common, high-value actions people take online. They've packaged these into Standard Events, which are basically the universal language for e-commerce and lead generation across their entire platform.
The best part? You don't need to be a developer to get these working. The Event Setup Tool is a slick point-and-click interface that lets you map these events to buttons and pages on your live site.
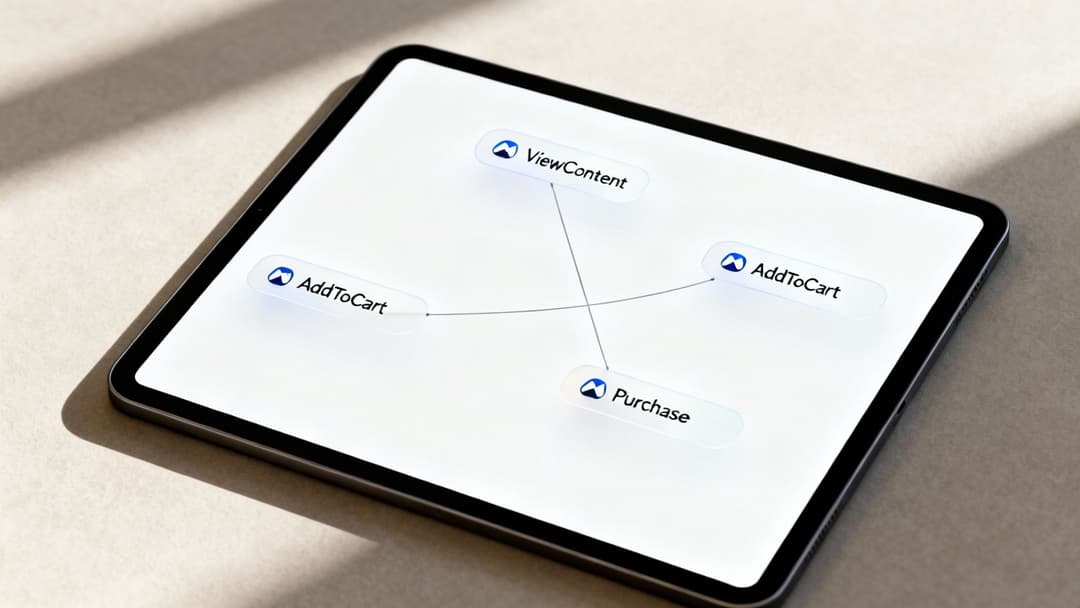
Here are the non-negotiable Standard Events you should set up first:
- ViewContent: Fires when someone views a specific product or landing page. Essential for seeing what’s catching people’s eye.
- AddToCart: Tracks when an item is added to a shopping cart. This is a massive intent signal and your first step to building audiences for cart abandonment ads.
- InitiateCheckout: Records when someone starts the checkout process. This helps you pinpoint exactly where people might be dropping off in your funnel.
- Purchase: The holy grail. This tracks completed sales and lets you accurately measure your Return on Ad Spend (ROAS).
- Lead: For service-based businesses or B2B, this tracks form submissions, flagging a potential new customer.
To get started, just pop your website's URL into the Events Manager. It’ll open your site with an interactive overlay. From there, you can literally click a button like "Add to Cart" and assign the corresponding event to it. It’s a game-changer for getting foundational tracking done in minutes. While the entire world of conversion tracking is a deep topic, this tool makes getting started incredibly straightforward.
Going Further with Custom Events
Sometimes, the standard options just don't cover a unique action that’s crucial for your business. Maybe you want to track when someone watches more than 50% of a video, clicks a "Request a Demo" button that doesn't go to a new page, or downloads a PDF. That's what Custom Events are for.
Unlike Standard Events, you can name these whatever you want—think VideoPlay_50Percent, DemoRequestClick, or EbookDownload. They require a bit more legwork, usually involving Google Tag Manager or a snippet of code, but the granularity you get is well worth it.
By tracking custom user interactions, you can build hyper-specific audiences. Imagine creating an audience of everyone who downloaded your "Beginner's Guide" PDF and then showing them ads for your advanced course. That's the kind of targeted marketing that Custom Events unlock.
Using Custom Conversions for Smart Tracking
What if you want to track a conversion without touching any code? Custom Conversions are your new best friend. They let you define a conversion based on simple URL rules.
The classic use case is for "thank you" pages. When a user signs up for a newsletter or buys a product, they’re often sent to a page like yourwebsite.com/thank-you. You can create a Custom Conversion that tells Meta to count a conversion every single time someone lands on a page where the URL contains /thank-you. It’s a brilliantly simple and effective way to track goals, perfect for marketers who need to move fast.
This kind of event data is exactly what fuels Meta’s most powerful advertising features. For instance, since its launch, the Meta Pixel has been the engine behind lookalike audiences, which power 70-80% of scaled campaigns for both B2B and e-commerce brands. This setup might only take a few minutes, but it can lead to a massive lift in your ROI.
To help you decide which method to use and when, the table below breaks down the key differences.
Standard Events vs Custom Events vs Custom Conversions
Choosing the right tracking method can feel confusing, but it's really about picking the right tool for the job. This table breaks down what each method is best for, how it's implemented, and a real-world example to make it concrete.
| Tracking Method | Best For | Implementation Method | Example |
|---|---|---|---|
| Standard Events | Common, high-value actions like purchases, leads, and adding to cart. | Event Setup Tool (no-code), Partner Integration, or manual code. | Tracking when a user clicks the "Buy Now" button and completes a transaction. |
| Custom Events | Unique interactions not covered by standard events, like video views or specific button clicks. | Google Tag Manager or by adding custom JavaScript snippets to your site. | Firing an event when a user watches a product demo video for at least 60 seconds. |
| Custom Conversions | Tracking conversions based on URL rules, especially for "thank you" pages, without adding new code. | Defined directly within Meta Events Manager using URL contains/equals rules. | Creating a conversion for anyone who lands on /order-confirmation. |
By mixing and matching these three methods, you can go way beyond simple page traffic. You'll start mapping the entire customer journey, giving you the insights needed to not only measure what's working but also to build the powerful audiences that will drive your next wave of growth.
Verifying Your Pixel and Troubleshooting Common Issues
Getting your Meta Pixel installed and events configured is a huge step, but don't pop the champagne just yet. An incorrectly firing pixel can feed bad data into your ad campaigns, which is often worse than having no data at all. This final check is crucial to make sure your setup is working perfectly and your data is trustworthy.

The first tool you absolutely need in your arsenal is the Meta Pixel Helper. It’s a free Chrome extension that basically acts as your personal pixel detective. Once you've got it installed, its little icon will light up on any site where a pixel is active.
Just start clicking through your website like a regular visitor would. Click the Pixel Helper icon, and it will give you the inside scoop on exactly which events are firing on that page—like PageView, ViewContent, or AddToCart. A green checkmark is what you want to see; it means everything's firing on all cylinders. If you see a yellow or red icon, it's flagging an error that needs your attention.
Using The Test Events Tool
For a more robust, real-time diagnostic, head back into your Events Manager and find the Test Events tab. Think of this as mission control, giving you a live feed of all the activity your pixel is recording from both your browser and your server.
All you have to do is enter your website's URL and click "Open Website." As you browse your site in the new window that pops up, you'll see every event appear in the Test Events tool within seconds. This is, without a doubt, the best way to confirm that your Purchase event, including its value and currency parameters, is firing correctly after you run a test transaction.
The combination of the Pixel Helper and the Test Events tool is your complete debugging toolkit. The Helper gives you a quick, on-page status check, while Test Events provides a detailed, real-time log of every piece of data your pixel sends to Meta.
Solving Common Pixel Problems
Even with the most careful setup, things can go sideways. The good news is that most problems are pretty common and usually have a straightforward fix. Let's walk through the top three headaches marketers run into and how to solve them.
1. The Pixel Isn't Detected at All
You’ve installed the code, but the Pixel Helper icon is staying stubbornly gray. This almost always points to a simple installation error.
- Manual Install: Double-check that you placed the pixel code snippet in the right spot. It needs to be inside the
<head>section of your website’s HTML, right before the closing</head>tag. A very common mistake is accidentally dropping it into the<body>instead. - Plugin Install (Shopify/WordPress): Did you remember to save and publish your changes after pasting in the Pixel ID? Sometimes a simple website cache is the culprit, preventing the new code from loading. Try clearing your site’s cache as a first step.
- Ad Blockers: This is a surprisingly frequent offender. Disable any ad-blocking extensions in your browser, as they often prevent the pixel script from loading in the first place.
2. Standard Events Aren't Firing Correctly
You can see the basic PageView event firing just fine, but your AddToCart or Lead events are nowhere to be found when you test those actions. This usually means the event triggers themselves are misconfigured.
If you used the Event Setup Tool, go back and double-check that your events are mapped to the correct buttons or page URLs. For those using Google Tag Manager, dive into GTM’s Preview mode to confirm your triggers are actually firing on the right user actions. A tiny typo in a URL rule or a CSS selector is all it takes to break the trigger.
3. Data Discrepancies Between Platforms
This is a classic. You see 10 purchases in your Shopify dashboard, but Ads Manager is only reporting 7. This gap is often caused by ad blockers, browser privacy settings (hello, iOS 14+), or cookie consent rules that prevent the pixel from firing for every single user.
While you'll never get to 100% accuracy with a browser-side pixel alone, this is exactly where adding the Conversions API becomes essential for painting a more complete picture. The world of digital advertising is complex; a good overview comparing ad tracking tools can provide valuable context on why these discrepancies are so common.
Level Up Your Tracking with the Conversions API
While the Meta Pixel is a workhorse, it has one major weakness: it lives and dies in the user's browser. This makes it vulnerable to a whole host of data-blocking issues that are only becoming more common—ad blockers, cookie consent pop-ups, and game-changing privacy updates like Apple's iOS changes.
These disruptions punch holes in your data, leading to fuzzy attribution and campaigns that are running half-blind. This is exactly where the Conversions API (CAPI) comes in to save the day.
Think of CAPI as a direct, secure hotline between your website's server and Meta's. Instead of relying on the shaky connection from a user's browser, CAPI sends event data straight from your server. The result is a much more reliable and resilient tracking setup.
By running the browser-based Pixel alongside the server-side Conversions API, you're essentially creating a backup system. This dual-tracking approach means more of your conversion events get captured, even when browser tracking gets blocked. You get a far more complete picture of your campaign performance.
How CAPI and the Pixel Work Together
When you have both running, Meta is smart enough to "deduplicate" events. It uses unique event IDs to see when the same action—like a specific purchase—is reported by both the Pixel and CAPI. This prevents double-counting and keeps your data clean.
This hybrid setup seriously boosts your event match quality, which is the key to accurately crediting sales to your ads and letting Meta's algorithm find more people like your best customers.
With a more complete dataset, Meta’s delivery system gets a much clearer signal about who is actually converting. This translates directly to smarter ad delivery, better audience building, and a more accurate way to measure ad effectiveness across all your campaigns.
How to Get Started with CAPI
Don't worry, you don't need a computer science degree to implement the Conversions API. For most of us, the easiest route is through partner integrations that do all the heavy lifting for you.
- Platform Integrations (e.g., Shopify, WooCommerce): If you're using a major e-commerce platform, turning on CAPI is often as easy as flipping a switch in your Meta integration settings. Platforms like Shopify have fantastic native integrations that set up both the Pixel and CAPI for you, practically on autopilot.
- Conversions API Gateway: For sites on WordPress or other self-hosted setups, Meta offers the Conversions API Gateway. It’s a "low-code" tool you can set up on a cloud server. It automatically listens for website events and pipes them through CAPI without you having to write a bunch of custom code.
- Google Tag Manager (Server-Side): This is the power-user option. If you're already comfortable with Google Tag Manager, setting up a server-side GTM container gives you maximum control. You can route data from your normal web container to a server container, which then securely passes it along to Meta via CAPI.
At the end of the day, pairing the Conversions API with your Meta Pixel isn't just a nice-to-have anymore. It's a fundamental step to future-proof your advertising. By building a more robust data foundation, you ensure your campaigns are fueled by the most accurate information available, giving you a serious advantage in an increasingly privacy-first world.
Using Pixel Data to Scale Your Ad Campaigns
Getting the Meta Pixel installed is a great first step, but the real magic happens when you start turning that raw data into smarter advertising. Once your event tracking is solid, you're not just collecting stats—you're building an asset that will fuel your campaign's growth and make your ad spend work harder. This is where all that setup work starts to pay off.
The most direct way to see this in action is by building hyper-targeted Custom Audiences. For example, you can create a dynamic list of everyone who triggered an AddToCart event in the last 14 days but never made it to the Purchase event. With this audience, you can run incredibly relevant retargeting ads, maybe offering a small discount to nudge those high-intent shoppers over the finish line.
From Data to High-Performing Audiences
Beyond simple retargeting, your pixel data is the key to Meta's most powerful audience tool: Lookalike Audiences. By feeding Meta a source audience of your best customers—say, everyone who triggered a Purchase event with a value over $100—you're telling the algorithm to go find new people who look and act just like them.
This is how you scale campaigns effectively. You're essentially cloning your ideal customers, which seriously boosts the odds of reaching new people who are already primed to convert. For a deeper dive, check out our guide on creating powerful Facebook Lookalike Audiences. Once your Pixel is humming along, these insights can dramatically improve your ecommerce conversion rate.
The core idea is simple: The better your source data (your pixel events), the better your Lookalike Audience will be. This is exactly why a meticulous event setup isn't just a "nice-to-have"—it's non-negotiable for any serious advertiser.
Finally, you can start optimizing your campaigns for specific conversion events. Instead of just aiming for clicks or impressions, you can tell Meta's ad algorithm to hunt for Leads or Purchases. The system will then use your pixel data to find people within your target audience who are most likely to take that exact action, making every dollar you spend go much further.
As platforms evolve and introduce new restrictions, nailing your Facebook Pixel setup is more critical than ever. The fundamentals—linking your Pixel, assigning permissions, and configuring events—are what ensure you can track performance accurately. This is especially true on Facebook, which still leads in e-commerce with a 38.5% purchase intent over Instagram. Tools like AdStellar AI can take this even further, using your historical pixel data to automate the creation and testing of hundreds of ad variations, ensuring you're only scaling what actually works.
Your Meta Pixel Questions, Answered
Even the smoothest setups can leave you with a few lingering questions. It happens to everyone. Let's tackle some of the most common ones that pop up when you're getting the Meta Pixel up and running.
Can I Have Multiple Meta Pixels On My Website?
Technically, you can, but I’d strongly advise against it. It's a classic case of "just because you can, doesn't mean you should." Running more than one Pixel from the same Business Manager on your site is a recipe for disaster. You'll almost certainly end up with duplicated data, events firing all over the place, and a reporting nightmare that makes optimization impossible.
The gold standard here is to stick with one single Pixel for your entire website. If you need to track different actions or segment your sales funnel, that's what custom events and custom conversions are for. This keeps all your data centralized and, most importantly, clean.
How Long Does Pixel Data Take To Appear?
Your Pixel data should start showing up almost immediately. When you're using the "Test Events" tool inside Events Manager, you'll see activity pop up within seconds of taking an action on your site. It’s pretty much real-time.
When it comes to your campaign reports in Ads Manager, give it a little more time. It can take a few hours for all the data to be fully processed and attributed to your ads. As a rule of thumb, if you check back after 24 hours and still see nothing, that's your cue to start troubleshooting.
Does The Meta Pixel Slow Down My Website?
This is a big concern for a lot of people, but you can breathe easy. The Pixel is engineered to be incredibly lightweight.
The Meta Pixel's code is asynchronous, which means it loads in the background. It won't block other elements on your page from rendering, so its impact on your website's speed is generally negligible and not noticeable to your visitors.
Because it loads "asynchronously," it doesn’t get in the way of your actual page content loading for the user. Any impact on your site's speed is so minimal that your visitors will never notice.
If you're using a tool like Google Tag Manager, you get even more control over how it's implemented, ensuring it fires efficiently without bogging anything down. Go ahead and install it with confidence—it won't create a poor user experience.
Ready to turn your Pixel data into high-performing ad campaigns? AdStellar AI automates ad creation, testing, and scaling, so you can launch hundreds of variations in minutes and let AI find the winning combinations for you. Start scaling your Meta ads 10x faster.