You're staring at a Slack message from your media buyer at 3 PM on a Thursday. "Need 30 ad variations by Monday to test the new campaign angle. Can you make it happen?"
You do the math. Your designer can realistically produce maybe 6-8 high-quality ads by Monday if they drop everything else. That leaves 22-24 variations sitting in limbo while your competitor—who figured out how to design ads at scale—is already three testing cycles ahead of you.
This isn't a resource problem. It's not even a talent problem.
It's a systems problem disguised as a creative bottleneck.
Here's what most performance marketers miss: The companies winning in paid advertising aren't hiring armies of designers or paying premium agency rates for faster turnarounds. They've fundamentally reimagined what "designing ads" actually means.
They've stopped treating ad design as an artistic endeavor where each piece needs to be hand-crafted from scratch. Instead, they've built systematic workflows where one strategic design session produces 50, 100, or even 200 testable variations. The math shifts from "5 days per ad" to "5 days for 50 ads."
That's not hyperbole. That's the difference between designing individual ads and building ad generation systems.
This guide walks you through exactly how to make that shift—step by step. You'll learn how to create comprehensive design briefs that eliminate revision cycles, build modular template systems that scale exponentially, execute batch production workflows that generate dozens of variations in hours instead of weeks, and implement testing frameworks that turn design decisions into data-driven insights.
By the end, you'll have a repeatable process for producing 20-100 ad variations per concept without hiring additional designers, paying agency premiums, or sacrificing quality. You'll match your creative production velocity to your testing velocity—finally.
Let's walk through how to design ads at the speed your campaigns actually need—step by step.
Step 1: Build Your Ad Design Brief (The Foundation That Prevents Revisions)
Here's the uncomfortable truth: Most ad design problems aren't design problems at all. They're brief problems.
When your designer comes back with something that "misses the mark," it's usually because the mark was never clearly defined. When you're three revision rounds deep and still not happy, it's because the brief left too much open to interpretation. When your beautiful ad gets 0.4% CTR, it's because nobody defined what success actually looked like before the design began.
A comprehensive brief doesn't just speed up design—it eliminates the revision cycle entirely. Let's build one that does exactly that.
The 5 Non-Negotiable Brief Components
Every scalable ad design brief must answer five specific questions before a single pixel gets pushed. Miss any one of these, and you're building on quicksand.
Campaign Objective (The "Why"): Start with the specific action you want. Not "increase sales"—that's too vague. Instead: "Drive add-to-cart from warm audiences (website visitors, past 30 days) at $4 CPA or lower." The objective determines everything else. Awareness campaigns need bold visuals and minimal text. Conversion campaigns need clear CTAs and trust signals. Get this wrong, and even beautiful design fails.
Target Audience Segment (The "Who"): Demographics aren't enough. You need psychographics and awareness level. What does this audience already know about your product? What objections do they have? "E-commerce shoppers who viewed product but didn't purchase, familiar with category, primary objection is shipping cost" gives your designer actual insight. Building facebook ads custom audiences with this level of specificity transforms targeting from guesswork into precision.
Core Message/Value Proposition (The "What"): One clear promise. Not three benefits crammed into a headline. One. "Free shipping + 30-day returns removes purchase risk" is a complete message. "Fast shipping, great quality, affordable prices, excellent service" is a confused mess. Your designer can't create visual hierarchy when you haven't created message hierarchy.
Proof Points/Credibility Elements (The "Why Believe You"): What makes your claim credible? "4.8-star rating from 12,000+ customers, featured in TechCrunch" gives your designer specific elements to incorporate. "We're trustworthy" gives them nothing. Social proof, authority signals, and risk reversal aren't marketing fluff—they're design requirements.
Success Metrics (The "How We Measure"): Define the target before design begins. "Target 2.5% CTR, 3.2% conversion rate, $4 CPA" tells your designer exactly what winning looks like. It also creates accountability. When you know your current benchmark is 1.8% CTR, you can evaluate whether the design actually improved performance or just looked prettier. Understanding performance analytics for ads helps you set realistic benchmarks based on industry data rather than arbitrary goals.
The difference between a vague brief and a comprehensive one isn't length—it's specificity. Compare these two briefs for the same campaign:
Before: "Make an ad for our new product launch. Target women who like fashion. Make it look premium. Need it by Friday."
After: "Conversion campaign targeting women 28-42 who browsed our spring collection but didn't purchase (retargeting audience, 7-day window). Core message: 'Spring refresh, zero risk—free returns through May 31st.' Proof: 4.7★ rating, 8,500+ reviews, Vogue feature. Target: 2.8% CTR, $6 CPA. Need 15 variations testing headline/image combinations."
Step 2: Create Your Visual System (Design Once, Scale Forever)
Here's where the magic happens. You're not designing 50 individual ads anymore—you're building a system that generates 50 ads from 5 strategic design decisions.
Think of it like this: Instead of hand-crafting each ad from scratch, you're creating a modular framework where swapping one element (headline, image, CTA) instantly produces a new testable variation. One template design session becomes the foundation for hundreds of ads.
This is the shift from linear to exponential scaling.
Template Architecture: The Modular Approach
Every scalable visual system starts with master templates that have two distinct layers: fixed elements and variable zones.
Fixed elements are your design constants—the layout grid, brand colors, typography hierarchy, logo placement, visual flow patterns. These never change. They ensure brand consistency and make production predictable.
Variable zones are your testing levers—the headline area, primary image, supporting proof point, CTA button. These swap in and out to create variations. A single template might have 3-4 variable zones, and each zone can hold multiple options.
Here's the multiplication effect in action: Design one "Customer Testimonial" template with fixed quote bubble styling and brand elements. Create three variable zones: customer photo (5 options), quote text (8 variations), CTA button (3 options). That single 90-minute template design just produced 120 possible ad combinations (5×8×3).
You need five core template categories to cover most performance marketing scenarios:
Product Hero Template: Product as the star, minimal text overlay, clean background. Use this for awareness campaigns or when your product is visually distinctive. Variable zones: product angle, headline, background color/texture.
Customer Testimonial Template: Social proof-driven design with quote and customer photo. Perfect for consideration stage when trust is the barrier. Variable zones: customer image, testimonial quote, rating display, CTA.
Feature Comparison Template: Side-by-side or checklist format highlighting your advantages. Works for competitive differentiation campaigns. Variable zones: features listed, competitor comparison, visual icons, headline framing. Understanding what are the benefits of programmatic ads can help you decide when automated placement of these comparison ads will maximize reach.
Lifestyle Context Template: Product in use within aspirational setting. Ideal for emotional connection and lifestyle positioning. Variable zones: lifestyle image, user demographic, context setting, benefit headline.
Problem-Solution Template: Before/after or pain point → solution structure. Strongest for conversion campaigns with clear problem awareness. Variable zones: problem image/text, solution image/text, transformation messaging. Modern marketers are discovering how to use AI to launch ads using these templates at scale without manual repetition.
Design all five templates in one focused 8-10 hour session. That's your one-time investment. From that point forward, you're producing variations in 2-3 minutes each instead of starting from scratch every time.
Building Your Asset Library for Rapid Variation
Templates are only half the system. The other half is your organized asset library—the pool of images, headlines, CTAs, and proof points you'll swap into those variable zones.
Start by categorizing your assets by template and variable zone. For your Customer Testimonial template, you might organize assets like this: customer photos (lifestyle shots, headshots, product-in-use), testimonial quotes (short/punchy, detailed/specific, objection-focused), rating displays (star count, review count, third-party badges), and CTA variations (action-oriented, risk-reversal, urgency-driven). When you leverage ai ad creation tools, this asset library becomes the foundation for generating hundreds of variations automatically.
Here's the reality that changes everything: You can build the perfect systematic workflow for designing ads—comprehensive briefs, modular templates, batch production processes—and still hit a ceiling. Because even with optimized systems, there's still a human bottleneck in the execution layer.
That's where AI-powered ad creation platforms fundamentally shift the equation.
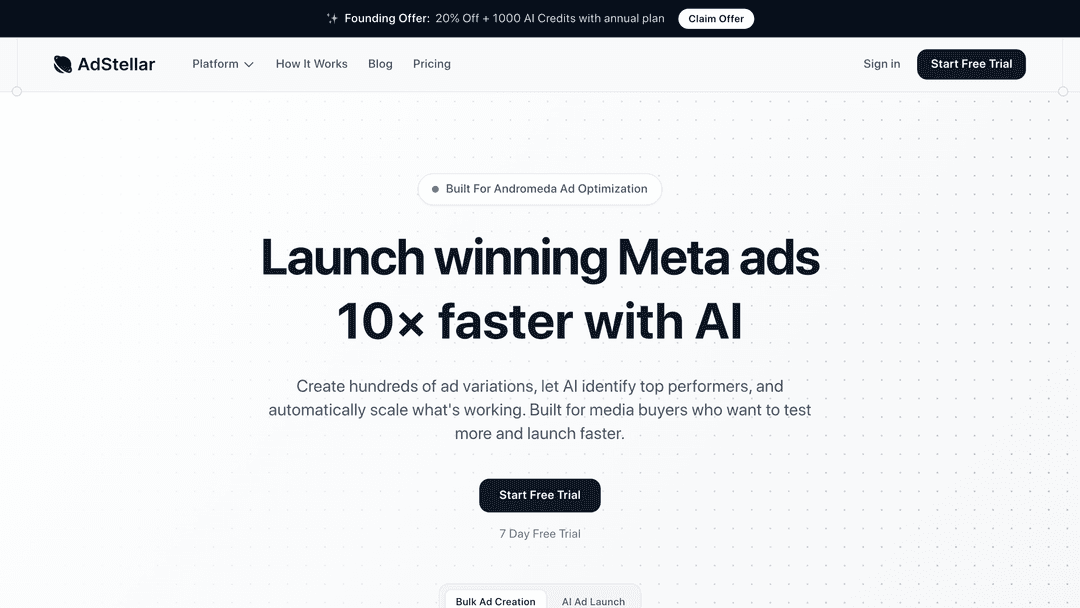
AdStellar AI approaches the scaling problem from a different angle entirely. Instead of optimizing how quickly your team can produce variations manually, it eliminates the manual production step altogether. You define your strategic inputs—brand guidelines, campaign objectives, target audiences, core messages—and the AI generates hundreds of ad variations automatically.
The workflow compression is significant. What takes a designer 3-5 hours using optimized batch production methods happens in minutes. You're not choosing between quality and quantity anymore—you get both simultaneously.
But production speed is only half the value equation. The more important capability is what happens after the ads launch.
AI-Driven Performance Optimization
Traditional testing frameworks require manual analysis. You launch your controlled variable tests, wait for statistical significance, review the data, identify winners, then manually allocate more budget to top performers. This cycle takes days or weeks, and by the time you've identified what works, market conditions may have shifted.
AdStellar's AI continuously monitors performance across all your variations in real-time. It identifies which combinations of headlines, images, CTAs, and audiences are driving your target metrics—whether that's CTR, conversion rate, CPA, or ROAS. Then it automatically scales budget toward top performers while reducing spend on underperforming variations.
This creates a feedback loop that operates at machine speed rather than human speed. Your campaigns optimize themselves based on actual performance data, not hunches or delayed manual analysis.
Built for Media Buyers Who Need Velocity
The platform is specifically designed for the reality media buyers face: tight deadlines, multiple campaigns running simultaneously, constant pressure to test new angles and audiences, and the need to prove ROI quickly.
Instead of waiting days for your design team to produce enough variations for meaningful testing, you can launch comprehensive test campaigns the same day you brief the concept. Instead of manually reviewing performance dashboards and adjusting budgets across dozens of ad sets, the AI handles optimization while you focus on strategic decisions.
The practical impact is straightforward: You can test more hypotheses, launch campaigns faster, and identify winning combinations before your competitors even finish their first design round. When your testing velocity increases by an order of magnitude, you learn what resonates with your audience faster—and that learning compounds over time.
For media buyers managing multiple clients or running high-volume campaigns, this velocity advantage isn't incremental. It's the difference between testing 5 angles per quarter and testing 50 angles per quarter. More tests means more data. More data means better decisions. Better decisions mean better performance.
The systematic workflows we've covered in this guide remain valuable—they teach you how to think about scalable ad production strategically. But when you're ready to remove the execution bottleneck entirely and let AI handle the repetitive production and optimization work, that's when your creative testing capacity stops being limited by human hours.
The key is creating enough variety within each category to produce meaningful test combinations. Five customer photos × eight testimonial quotes × three CTA buttons = 120 unique ads from one template. But those 120 ads are only valuable if each variable actually tests a different hypothesis.
Your headline library should test different psychological triggers: benefit-focused ("Save 3 hours per day"), fear-based ("Stop losing customers to slow response times"), social proof ("Join 10,000+ teams"), curiosity ("The workflow hack nobody talks about"), and urgency ("Last chance: Offer ends Friday"). Each headline type appeals to a different audience segment or awareness level.
Your image library needs similar strategic variety: product angles (front view, in-context, detail shot), lifestyle contexts (office, home, on-the-go), user demographics (age, gender, profession), and emotional tones (aspirational, relatable, professional). Don't just collect random images—build a library that lets you test specific hypotheses about what resonates with your audience.
Organize everything in a shared folder structure that mirrors your template architecture. When your designer needs to produce 50 variations of the Product Hero template, they know exactly where to find the 10 product angles, 15 headlines, and 5 background options that will generate those combinations. No hunting, no guessing, no wasted time.
Step 3: Execute Batch Production (Turn 50 Hours Into 5)
You've built your brief. You've designed your templates. You've organized your asset library. Now comes the execution phase where most teams still waste 90% of their time.
The problem isn't the work itself—it's the context switching. Opening Photoshop, selecting a template, swapping one headline, exporting, uploading, repeating 49 more times. Each individual task takes 30 seconds, but the cognitive load of switching between tasks turns 25 minutes of actual work into 3 hours of fragmented effort.
Batch production eliminates that waste by grouping identical tasks together. Instead of completing one ad from start to finish before moving to the next, you complete one task type across all ads simultaneously.
The Batch Production Workflow
Here's the systematic approach that turns 50 hours of ad production into 5:
Batch 1: Template Setup (30 minutes): Open all master templates you'll use for this campaign. Create duplicate working files for each planned variation. Name them systematically (ProductHero01, ProductHero02, etc.). This setup phase happens once, and now you have 50 blank canvases ready for rapid population.
Batch 2: Image Placement (45 minutes): Go through all 50 files and drop in the primary images only. Don't touch headlines, don't adjust CTAs, don't export. Just images. When you're in "image mode," your brain optimizes for visual composition and you work 3-4x faster than if you're switching between images, text, and exports.
Batch 3: Headline Integration (30 minutes): Now cycle through all 50 files again, this time adding only headlines. Copy from your headline library, paste into each template, adjust sizing if needed. You're in "text mode" now—your brain is focused on typography, hierarchy, and readability. This focused state is exponentially more efficient than scattered attention.
Batch 4: CTA & Proof Points (20 minutes): Third pass through all files. Add CTAs, social proof elements, rating badges, or other supporting details. These are usually simple copy-paste operations from your asset library, so batching them takes minimal time.
Batch 5: Quality Check (25 minutes): Fourth pass, now reviewing each ad for visual consistency, brand alignment, and technical issues. You're in "editor mode"—catching typos, alignment issues, color inconsistencies. This is much faster than trying to design and edit simultaneously.
Batch 6: Export & Upload (30 minutes): Final pass. Export all 50 files using your preset export settings. Upload to your ad platform in bulk. Name files according to your tracking convention. This mechanical process is fastest when done in one uninterrupted session.
Total time: 3 hours for 50 ads. That's 3.6 minutes per ad versus the 60+ minutes it takes to complete each ad individually from start to finish. The work is identical—the efficiency comes from eliminating context switching.
Automation Multipliers
Batch production is powerful, but automation takes it further. Look for opportunities to eliminate repetitive manual tasks entirely:
Design automation tools: Platforms like Canva Pro, Figma with plugins, or Adobe Creative Cloud Libraries let you create templates with linked assets. Change one master asset, and it updates across all instances automatically. One headline edit propagates to 20 ads instantly.
Bulk export scripts: Instead of manually exporting 50 files, use batch export actions in Photoshop or scripts in Figma. Set your export parameters once, select all files, execute. Walk away for 2 minutes while the software handles the rest.
Naming conventions + metadata: Use systematic file naming that includes campaign, template type, and variation number (Campaign-Q2-ProductHero-Var01.jpg). This makes bulk uploading and tracking infinitely easier. Many ad platforms can auto-populate campaign structure based on file names.
Upload automation: Tools like Zapier or platform-specific APIs can automatically upload exported files to your ad accounts based on folder location or naming convention. Export to a watched folder, and files appear in your ad account 30 seconds later without manual upload.
The goal isn't to automate everything—it's to automate the mechanical tasks so your team can focus on the strategic decisions that actually require human judgment. Your designer should spend 80% of their time on creative strategy and 20% on execution, not the reverse.
Step 4: Implement Testing Frameworks (Turn Design Into Science)
You've just produced 50 ad variations in a fraction of the time it used to take for 5. But volume without strategy is just noise. The final step is implementing testing frameworks that turn your design decisions into data-driven insights.
This is where most teams fail. They produce lots of ads, launch them all simultaneously, and then can't figure out which specific element drove performance differences. Was it the headline? The image? The CTA? The audience? When you test everything at once, you learn nothing.
Controlled variable testing solves this. You isolate one variable at a time, hold everything else constant, and measure the impact. This systematic approach transforms ad design from subjective preference into objective performance data.
The Controlled Variable Testing Framework
Test Round 1: Headline Variations (Week 1): Start with your Product Hero template. Use the same image, same CTA, same audience. Create 5-8 ads that differ only in headline. Launch with equal budget distribution. After 3-5 days or 1,000 impressions per variation (whichever comes first), you'll have clear data on which headline approach resonates. The winner becomes your control for the next test.
Test Round 2: Image Variations (Week 2): Take your winning headline from Round 1. Now test 5-8 different images with that same headline, same CTA, same audience. Product angle vs. lifestyle context vs. close-up detail. After another 3-5 days, you know which visual approach performs best. Now you have a winning headline + winning image combination.
Test Round 3: CTA Variations (Week 3): Using your winning headline + image, test 3-5 different CTAs. "Shop Now" vs. "Learn More" vs. "Get Started" vs. "Claim Offer." This test usually converges faster because CTAs have less impact than headlines or images, but the data is still valuable.
Test Round 4: Template Variations (Week 4): Now that you have a winning combination within one template, test that same combination across your other template types. Does your winning headline + image perform better in the Product Hero format or the Lifestyle Context format? This reveals which template architecture resonates most with your audience.
After four weeks of systematic testing, you have a data-backed winner: the optimal combination of headline, image, CTA, and template format for this specific audience and campaign objective. That's your new control. Now you start the cycle again, testing new variations against this proven winner. Using how to analyze ad performance frameworks helps you identify which metrics actually matter for declaring winners versus vanity metrics that mislead.
Performance Feedback Loops
Testing frameworks only work if you actually use the data to inform future decisions. Build feedback loops that capture learnings and apply them systematically:
Weekly performance reviews: Every Monday, review the previous week's test results. Document winners, losers, and insights. "Lifestyle images outperformed product shots by 34% CTR" isn't just a data point—it's a strategic directive for next week's creative production.
Creative insight database: Maintain a simple spreadsheet or Notion database tracking what works. Columns: Test date, variable tested, winner, performance delta, audience segment, campaign objective. Over time, patterns emerge. "Urgency-based headlines consistently outperform benefit-based headlines for retargeting audiences" becomes a reliable principle, not a lucky guess.
Asset library optimization: Use performance data to prune your asset library. If lifestyle images consistently outperform product shots, stop producing product shots. If short, punchy headlines beat long, detailed ones, archive the long versions. Your asset library should evolve based on what actually works, not what you think should work.
Template refinement: If one template format consistently underperforms, either fix it or eliminate it. Maybe your Feature Comparison template needs better visual hierarchy. Maybe your Problem-Solution template doesn't resonate with your audience at all. Let the data guide your design system evolution.
The goal is continuous improvement. Each testing cycle should make your next campaign smarter, faster, and more effective. After 6 months of systematic testing, your "first draft" ads will outperform most competitors' final versions because you're building on months of validated learnings instead of starting from scratch each time.
Putting It All Together
You've just learned how to transform ad design from a creative bottleneck into a systematic, scalable process. The difference between designing 8 ads per week and 80 ads per week isn't talent or budget—it's methodology.
Start with a comprehensive brief that answers the five non-negotiable questions: campaign objective, target audience, core message, proof points, and success metrics. This foundation eliminates 80% of revision cycles before design even begins.
Build your visual system next—5 master templates with modular variable zones can generate hundreds of variations from a single design session. The multiplication effect is real: one 90-minute template investment produces 120+ testable ads.
Execute batch production by grouping similar tasks together. Design all headlines at once, swap all images in sequence, export everything in one session. This workflow turns 50 hours of work into 5 hours.
Implement testing frameworks that treat design as science, not art. Controlled variable testing, performance feedback loops, and systematic iteration transform creative decisions into data-driven insights.
The companies winning in paid advertising aren't outspending you—they're outsystemizing you. They've built workflows where creative production matches testing velocity, where one strategic decision generates dozens of tactical variations, where design scales exponentially instead of linearly.
Ready to match your creative production to your campaign velocity? Get Started With AdStellar AI and let AI handle the variation generation while you focus on strategic creative decisions. Your competitors are already testing their 47th variation. It's time to catch up.