Getting started on Facebook Marketplace is almost deceptively simple. You just tap the Marketplace icon in your app, hit "Create New Listing," and start filling in the details. For most people, it's an instant feature linked right to your personal account—no crazy setup required to start selling in your neighborhood.
Why Facebook Marketplace Is a Goldmine You Can't Ignore
Before you list a single item, let's talk about the sheer scale of what you're stepping into. Facebook Marketplace isn't just a digital yard sale anymore. It has evolved into a serious e-commerce machine, perfect for testing new products, validating business ideas, and driving sales without a huge upfront investment. It’s a low-risk, high-reward channel for both solo sellers and established brands.
The platform's biggest advantage is the built-in audience that’s already there and ready to shop. When you post a listing, you get immediate access to a massive global user base. We're talking over 1.1 billion people using Marketplace every single month. That's nearly 40% of Facebook's entire audience actively looking to buy, which is how the platform rocketed to 2.5 billion active listings by late 2023.
A Strategic Tool for Growth
Think of Marketplace as more than just a place to make a few one-off sales. It’s a fantastic tool for organic discovery and customer interaction that can feed into your larger business goals.
- Zero-Cost Customer Research: See what products get the most views, saves, and messages without spending a penny on ads. Use that feedback to tweak your inventory or develop new product lines.
- Direct Customer Interaction: You get to talk directly with potential buyers through Messenger. This is pure gold for understanding their questions, what they’re looking for, and what features they actually care about.
- Local Market Domination: For local businesses, this is a game-changer. You can reach nearby customers who are actively searching for what you sell. You can even use this visibility to support your local Facebook advertising for local businesses campaigns.
Laying the Groundwork for Success
Getting your account and listings right from the very beginning is what separates the casual sellers from the pros. A complete profile, crisp photos, and quick, friendly communication all build trust and boost your seller rating. A good rating makes every future sale that much easier.
If you're looking for a resource that covers every angle of selling successfully, this detailed Facebook Marketplace Sellers Guide is an excellent place to dig deeper.
The most successful sellers don't just "post and pray." They treat Marketplace as a dynamic sales channel, constantly tweaking their approach based on real customer feedback and engagement.
Creating Your First Listing from Start to Finish
Alright, your Facebook account is set up and you're ready to start selling. This is where the magic happens. Getting that first item listed is your ticket into the game, and luckily, the process is pretty intuitive whether you're on your phone or a laptop.
The first step is a big one. Head over to Marketplace and hit the "Create new listing" button. Facebook will immediately ask you to choose a listing type. Picking the right one here is crucial because it determines who sees your item and what information you can add.
- Item for Sale: This is your go-to for almost everything. Think clothes, electronics, furniture, handmade crafts—you name it.
- Vehicle for Sale: This is a specialized category for cars, motorcycles, and the like. It gives you specific fields for make, model, mileage, and other details buyers expect.
- Home for Sale or Rent: Pretty self-explanatory. This is for real estate and includes fields for property type, square footage, and bedrooms.
Choosing the right category makes sure your listing shows up in the right searches and gives you the proper fields to fill out. No one wants to see a car listed with a clothing size.
A Walkthrough for Your First Item
Let's say you're selling a used Trek mountain bike. You'd pick "Item for Sale" and dive into the details. The interface is designed to walk you through it, but how you fill it out is what separates a quick sale from a listing that just sits there.
Your first job, and honestly the most important one, is to add photos. Do not skimp on this. I've seen it time and time again—listings with a single, blurry photo get ignored.
Take clear shots from every angle. Get close-ups of the gears, the brand logos, and any cool features. Just as important, be upfront about any dings or scratches. Honesty builds trust and saves you headaches later.
Think of it like this: mastering the setup is the bridge between seeing the potential of Marketplace and actually growing your sales. Now, let's nail down the details that make a buyer click "message."
Filling in the Essential Details
Once your photos are uploaded, it’s time to add the words that sell. Every field has a purpose, and filling them out completely helps buyers find you and feel confident in making an offer.
Pro Tip: The more detail, the better. Give them measurements, the exact brand name, and the condition. A buyer who has all their questions answered upfront is far more likely to make a solid offer right away.
Here's the breakdown of what you need to add:
- Title: Get specific. "Used Bike" is terrible. "Men's Trek Marlin 5 Mountain Bike - Size Large" is fantastic. It tells a buyer exactly what you have.
- Price: Do a quick search for similar bikes on Marketplace to see what they're going for. If you're open to a little haggling, toggle on the "Allow Offers" option.
- Category: Facebook is pretty good at guessing, but always double-check. For our example, make sure it’s in "Bikes" under the "Sports & Outdoors" category.
- Condition: Be honest here. The options range from "New" to "Used - Fair." Misrepresenting the condition is the fastest way to earn a bad seller rating and deal with angry buyers.
- Description: This is your chance to really sell it. Repeat the key details from the title, add measurements, mention any flaws again, and sprinkle in keywords a buyer would search for.
For businesses looking to really integrate their sales, managing individual listings is just one piece of the puzzle. It's smart to learn how to tie all your Meta activities together by exploring the features of the Meta Business Suite.
Finally, you'll set your location for local pickup and choose whether you want to offer shipping. Give it one last look in the preview, and then hit "Publish." Congratulations—your item is now live on Facebook Marketplace
Crafting Listings That Convert Browsers Into Buyers
Getting your listing live on Marketplace is just the first step. The real challenge? Turning all those eyeballs into actual sales. A basic, quickly thrown-together listing might get some views, but a truly optimized one is what separates casual sellers from those who consistently move inventory.
Think of every listing as its own dedicated sales page. You need to build trust and answer questions before a buyer even thinks to ask. This all starts with your photos.
You don't need a high-end camera. Your smartphone is more than enough, but you have to nail the fundamentals.
- Get the lighting right. Good lighting is non-negotiable. Natural, indirect light is always your best bet. Try taking your photos near a window, but stay out of direct sunbeams that cast harsh shadows.
- Show it all off. Don’t be shy. Capture the front, back, sides, top, and bottom. The more a potential buyer can see, the less they have to wonder about, which builds confidence.
- Zoom in on the details (and the flaws). Get close-ups of brand logos, unique textures, and especially any scuffs, scratches, or wear and tear. Being upfront about imperfections builds instant trust and heads off any potential disputes down the road.
Writing Titles and Descriptions That Sell
Once your photos have done their job and stopped the scroll, your words need to seal the deal. Your title is your hook—it's what gets you found in a sea of other listings. It needs to be loaded with the exact keywords a serious buyer would be searching for.
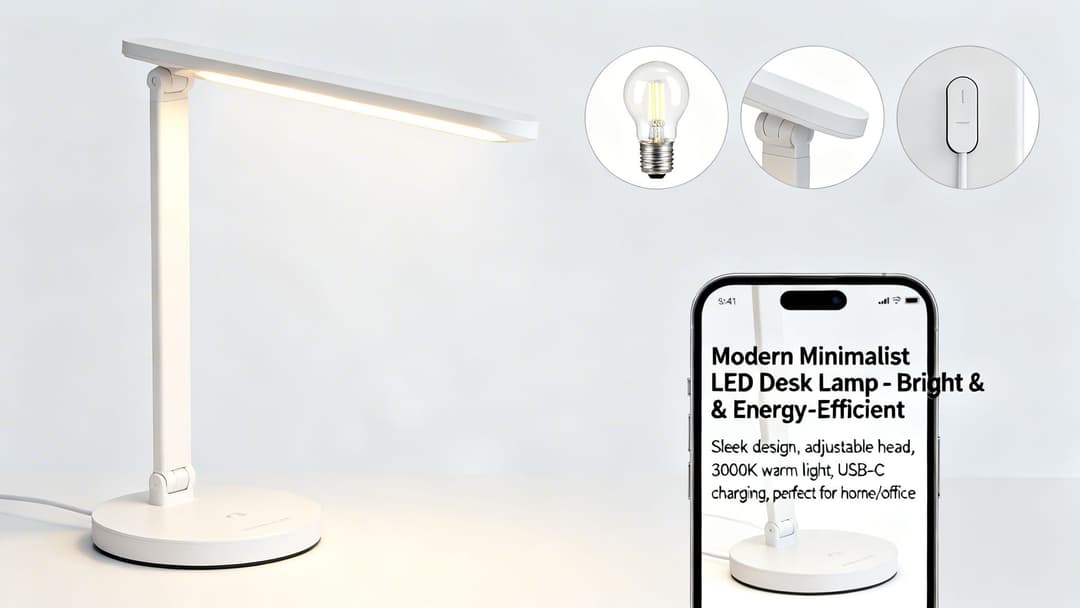
A lazy title is "Desk Lamp." A great title is "Modern White LED Desk Lamp with USB-C Charging - Adjustable Head." That one simple change means you're attracting people who already know what they want.
Your description is where you elaborate. Think of it as your silent salesperson. This is your chance to list out precise measurements, materials, and confirm the condition again. A solid description filters out the "Is this still available?" crowd and brings in serious offers. To really dig in, it's worth understanding the anatomy of a perfect product listing and applying those principles here.
Optimizing Your Listing Components
Every piece of your listing plays a role. Going from a basic effort to a pro-level setup can be the difference between a quick sale and an item that sits for weeks.
| Listing Component | Basic Approach | Pro-Level Optimization |
|---|---|---|
| Photos | 1-2 blurry or dark photos. | 8-10 bright, clear photos showing all angles, details, and any flaws. |
| Title | "Used Chair" | "Mid-Century Modern Walnut Accent Chair - Great Condition" |
| Description | "Works fine. Pick up only." | Detailed dimensions, materials, brand info, condition notes, and a friendly closing. |
| Pricing | Guessing a price. | Researching "Sold" listings for the same item and pricing 10-15% higher to allow for negotiation. |
By taking the time to optimize each component, you're not just listing an item; you're creating a compelling offer that stands out and builds buyer trust from the first click.
Setting a Price That Maximizes Profit
Pricing on Facebook Marketplace can feel like a guessing game, but it doesn't have to be. Price too high, and you'll get crickets. Price too low, and you're leaving cash on the table. Your first move should always be research.
Search for your exact item and filter by listings that are already marked "Sold." This shows you what people are actually willing to pay, not just what other sellers are asking. A great tactic is to price your item about 10-15% above your ideal sale price, especially if you check the "Allow Offers" box. This small buffer gives you negotiating power and lets the buyer feel like they got a deal.
Key Takeaway: Enabling the "Allow Offers" feature is a powerful negotiation tool. It signals flexibility and can attract buyers who might otherwise scroll past a fixed-price listing.
These optimizations are critical when you consider the scale of Marketplace. In 2023, users were exchanging a staggering 1.8 billion messages every single month, and 66.1% of social media buyers worldwide made their last purchase on Facebook. Little things like specific titles, fair pricing, and quick responses add up to big results.
Finally, don't underestimate a good call to action in your description. Even a simple, friendly line can prompt a buyer to take the next step. To get some great ideas, check out our guide on how to write a compelling call to action.
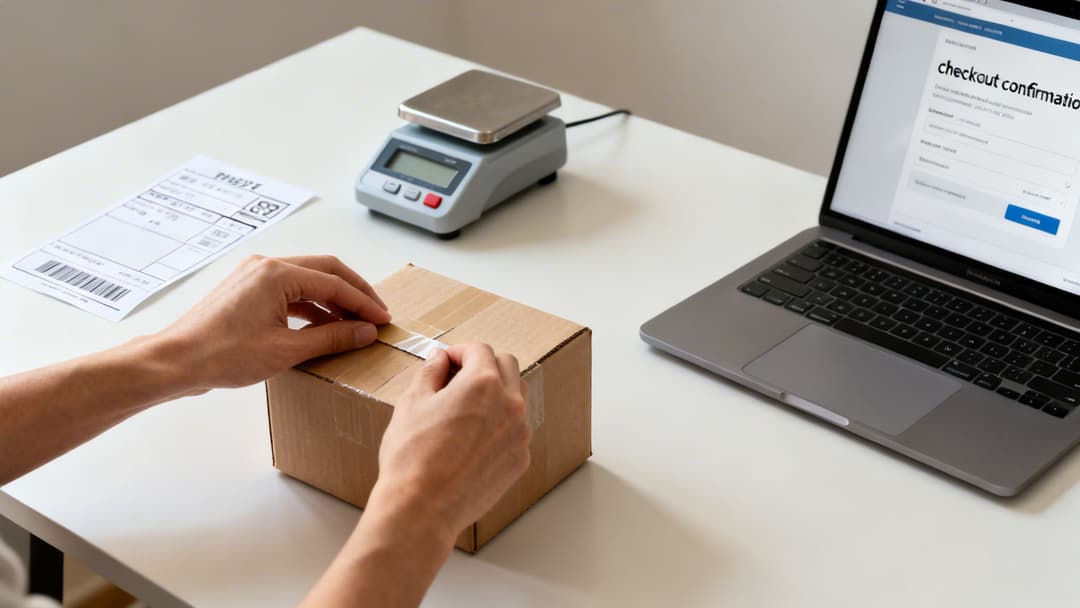
Managing Shipping, Checkout, and Payments with Confidence
You’ve made the sale. Awesome! But now comes the part that trips up a lot of new sellers: actually getting the item to the buyer and getting paid. A smooth post-sale process is what separates the pros from the amateurs and turns one-time buyers into repeat customers.
Your first big decision is whether to stick with local pickups or embrace nationwide shipping.
Local pickup is as simple as it sounds. You and the buyer agree on a public meeting spot and a time. They get their item, and you get paid, usually in cash or through a payment app. But if you're only selling locally, you're leaving a massive amount of money on the table. Shipping opens your shop to the entire country.
Enabling Shipping and Secure Checkout
If you want to offer shipping, you have to use Facebook's own checkout system. This isn't optional—it's how Meta protects both you and the buyer. Before you can list an item with shipping, you'll need to add your payment and shipping details to your Marketplace profile. It’s a quick, one-time setup that Facebook walks you through.
Once that’s done, you’ll unlock the shipping options on every new listing you create. This is where you’ll decide how to handle postage.
- Use a prepaid Facebook label: This is by far the easiest route. Facebook calculates the cost based on your item's weight and gives you a prepaid, trackable label to print. They just deduct the cost from your final payout. Simple.
- Ship on your own: This option gives you more control if you have a preferred carrier or want to use your own packaging. The trade-off is that you are responsible for buying the postage and manually entering the tracking number into the order details as soon as you ship.
For anyone just starting, I always recommend using the prepaid label. It removes any guesswork and makes sure the tracking info is uploaded correctly, which is absolutely critical for getting paid on time.
Understanding Fees and Getting Paid
Sellers often get hung up on fees, but Facebook’s structure is incredibly competitive. They take a 5% commission on shipped items, which is a fantastic rate designed to get more sellers to expand beyond their local area. It’s clearly working, as Marketplace Pay transactions rocketed to $50 billion in volume last year. These numbers show just how many people are comfortable buying and selling through the platform.
You can dig into more of these figures and their impact by checking out the latest Facebook Marketplace statistics on sqmagazine.co.uk.
Here’s how the payment flow works: After a customer buys your item, Facebook holds the payment in escrow. The funds are typically released to your linked bank account within 5 days after the tracking shows the item as delivered. If tracking isn't clear, it can take 15-20 days after you mark the item as shipped.
Key Insight: This payment hold isn't a bug; it's a core feature of the Purchase Protection program. It gives buyers the confidence to purchase shipped items, knowing their money is safe until they get what they ordered. That confidence is what gets you more sales.
This system also has your back. As long as you ship on time with valid tracking, you’re protected if a buyer tries to claim they never received their package. This setup lets you manage payments and grow your business without the usual headaches and risks of selling online.
If you’re also selling on other Meta platforms, our guide on how to set up a shop on Instagram can help you create a more cohesive social commerce strategy.
Advanced Tactics to Supercharge Your Marketplace Sales
Getting those first few messages is a great feeling, but what happens next? If you really want to turn Marketplace into a reliable source of income, you have to move beyond just posting and waiting. The most successful sellers are proactive, constantly working their listings to stay at the top of the feed and in front of new buyers.
It all starts with keeping your inventory fresh. Facebook's algorithm loves new content, and after about seven days, you'll notice a little "Renew" button pop up on your older listings. Tapping this is one of the easiest wins on the platform. It instantly bumps your item back to the top of search results, giving it a second life without any extra work.
But what about those stubborn items that just won't move, even after a few renewals? Don't give up on them. Instead, use the "Delete and Relist" feature. This trick takes all your original photos and text and creates a brand-new listing from scratch. To the algorithm, it looks like a completely new item, giving it a powerful jolt of visibility.
Amplify Your Reach Beyond Marketplace
One of the biggest mistakes I see new sellers make is keeping their listings confined to the main Marketplace feed. You're leaving a ton of money on the table if you do that. The real magic happens when you tap into local communities.
When you're creating a listing, Facebook gives you the option to cross-post it to relevant "Buy and Sell" groups. You can select up to 20 groups at once. Think about it—that's instantly putting your item in front of thousands of highly engaged local buyers who are specifically looking for things to buy. To dig deeper into this strategy, check out our guide on effective Facebook advertising in Groups, as many of the principles apply here, too.
Boosting Listings vs. Full Ad Campaigns
Sooner or later, you'll see a blue "Boost Listing" button and wonder if it's worth the money. This is your entry point into paid advertising on Meta, but it's important to understand what it is—and what it isn't.
A "Boost Listing" is like putting a spotlight on a single item. You set a small budget for a few days, and Facebook shows your listing to more people within Marketplace. It's a fantastic tactic for a high-value item you want to sell quickly.
A full-blown Meta Ads campaign, however, is a different beast entirely. It's about long-term strategy, not just a quick tactical push for one item.
- Boost Listing: A quick, targeted push for a single item to get it sold fast.
- Meta Ads Campaign: A strategic play to build a brand, drive consistent sales, and reach highly specific audiences across both Facebook and Instagram.
No matter which tactics you use, your reputation is everything. Always be quick to respond to messages, maintain a friendly and professional tone, and mark an item as sold the moment it's gone. A high seller rating is your most valuable asset. It builds trust with new buyers and encourages people to come back to you again and again.
Common Facebook Marketplace Questions Answered
Even with your first listing up and running, a few nagging questions are bound to pop up. It happens to everyone. Let's walk through some of the most common roadblocks new sellers face when getting started on Facebook Marketplace.
Why Is Facebook Marketplace Not Showing Up for Me?
So, you're ready to sell, but the Marketplace icon is nowhere to be found. Don't panic—this is a pretty common hiccup, and the fix is usually straightforward.
More often than not, it's a simple matter of account history. If your Facebook account is brand new, you're under 18, or you live in a country where Marketplace hasn't rolled out yet, you won't have access. Access can also get restricted if an account has a history of violating community standards.
The best first step? Just use Facebook a bit more actively for a few days to show you're a real, active user. It's also a good idea to peek at your Account Status page in your settings to see if Meta has sent any notifications that could clear things up.
Can I Use Multiple Facebook Marketplace Accounts?
The short answer here is a hard no. Facebook’s terms of service are crystal clear: one personal account per person. Your Marketplace access is tied directly to that one account.
Trying to set up multiple personal profiles to sell more stuff is one of the fastest ways to get all of your accounts suspended. It's just not worth the risk.
If you're running a business and want a separate presence, the right move isn't making another personal profile. Instead, you should be listing items through your official Facebook Page's commerce tools. This keeps all your business activity organized and, most importantly, fully compliant with Meta’s policies.
How Do I Avoid Scams on Facebook Marketplace?
Staying safe should always be your number one priority. First rule: keep all your communication inside Facebook Messenger. Scammers love to lure people over to text or email to get them off the platform and away from any safety nets.
Be extremely wary of anyone trying to pay with gift cards, personal checks, or some weird third-party app you've never heard of. These are huge red flags.
When you're selling locally, always insist on meeting in a public, well-lit place. The lobby of a police station or a busy coffee shop are great options. If you’re shipping, stick to Facebook’s official checkout system. This gives you Purchase Protection, and you should never, ever ship an item until you see a confirmed payment notification right inside the app.
Ready to turn your successful Marketplace listings into scalable ad campaigns? AdStellar AI can help you launch, test, and scale your Meta ads 10x faster. Generate hundreds of ad variations in minutes and let our AI find the winning combinations to maximize your return on ad spend. Discover how at https://www.adstellar.ai.