Ready to turn your Instagram profile into a serious sales engine? Good. The platform has moved way beyond just sharing photos; it’s now a go-to spot where 44% of users shop every single week.
Knowing how to set up an Instagram Shop isn't just a nice-to-have anymore. For direct-to-consumer brands, it's a critical way to grab sales the instant a potential customer discovers your product. This guide will walk you through the whole process, making sure you sidestep the common headaches and get it right the first time.
Before we jump into the step-by-step, let's get the boring-but-necessary stuff out of the way: eligibility. Not every account or product gets the green light, and figuring this out now will save you a world of frustration later. The main requirements are all about your business location, what you sell, and how your accounts are set up.
Instagram Shop Eligibility Checklist
To make sure you're ready to roll, run through this quick checklist. Ticking all these boxes is the first step to a smooth setup.
| Requirement | What You Need to Do | Why It's Important |
|---|---|---|
| Supported Market | Confirm your business is located in a country where Instagram Shopping is enabled. | Meta restricts commerce features to specific regions, so this is a hard gatekeeper. |
| Eligible Products | Ensure you primarily sell physical goods. | Services, digital products, and certain restricted items don't qualify for Shops. |
| Business/Creator Account | Convert your personal Instagram profile to a professional account. | This unlocks access to all the necessary commerce tools and analytics. |
| Connected Facebook Page | Link your Instagram account to a Facebook Business Page. | All the back-end management happens through Meta's Commerce Manager. |
| Website Domain | You must own the website where you plan to sell your products. | This is where you'll direct customers to complete their purchases (unless you use Checkout on Instagram). |
Getting these ducks in a row first is non-negotiable. Once you've confirmed you meet all the criteria, the technical setup becomes much more straightforward.
This simple flowchart breaks down how the key pieces fit together.
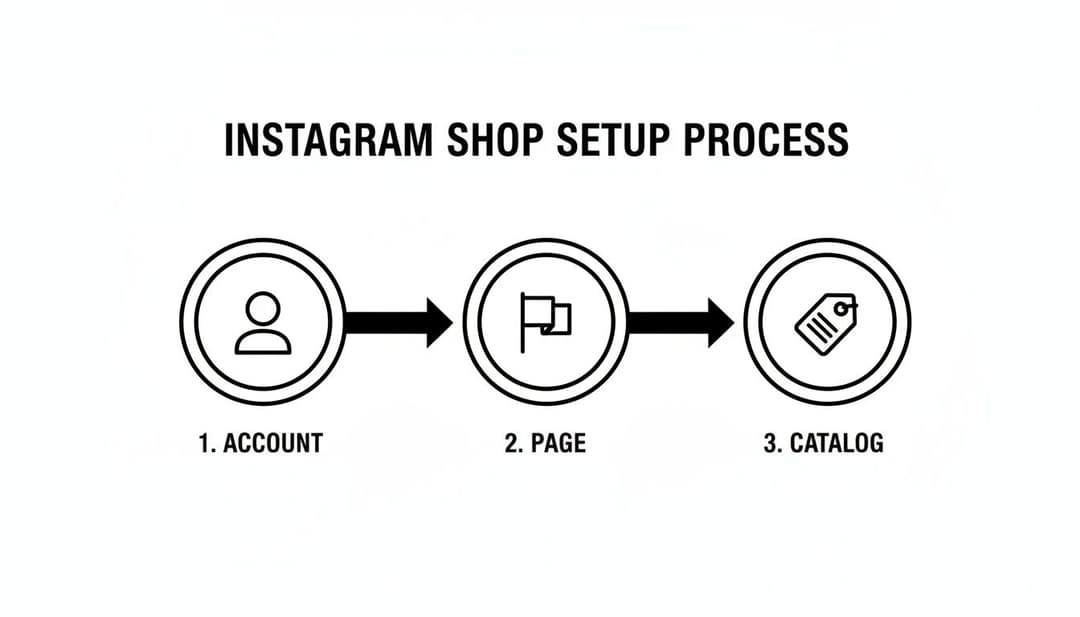
As you can see, it’s all about the connection between your professional Instagram account, your Facebook Page, and your product catalog. These three elements work in tandem to power your shop and create a seamless experience for your customers. It also helps to have a profile that's optimized for discovery, which you can read more about in our guide to Instagram navigation.
Building Your Shop's Foundation
Alright, you’ve confirmed you’re eligible. Now for the real work: laying the groundwork for your Instagram Shop. This is all about connecting the dots within Meta’s ecosystem, a crucial step before you can even think about uploading a single product. Get this wrong, and you'll be stuck before you even start.
First things first, your standard Instagram profile needs a promotion. It has to be either a Business or Creator account. For most e-commerce brands, a Business account is the way to go—it gives you all the analytics and advertising tools you need. Creator accounts are built more for influencers and public figures, offering different profile controls but still providing access to the necessary commerce features.
Making the switch is a breeze. Just head into your profile settings, find "Account," and tap "Switch to Professional Account." This simple change unlocks everything you need on the backend to get your shop running.

Connecting to Commerce Manager
Next up is a non-negotiable: you absolutely must link your Instagram account to a Facebook Business Page. Even if you haven’t touched your Facebook Page in years, this connection is mandatory. Think of it as the bridge to Commerce Manager, which is the central command center for everything related to your shop.
For a deeper dive into the broader toolkit you're unlocking, check out our guide to Meta Business Suite.
Once that connection is live, you can jump into Commerce Manager and officially create your shop. This is where you’ll decide how you want customers to pay you.
You've got three main options for checkout:
- Checkout on Your Website: This is the most popular choice. It sends shoppers directly to your e-commerce site to complete their purchase, keeping them in your ecosystem.
- Checkout with Instagram: If you're in the U.S., this is a fantastic option. Customers can buy your products without ever leaving the app, which makes for a super smooth, frictionless experience.
- Checkout with Messaging: This directs customers to Messenger or WhatsApp, where they can complete their purchase through a direct conversation with your brand.
Choosing the right method really comes down to where your business is located and what you're trying to achieve. Sending traffic to your website gives you total control over the customer journey, but that in-app checkout option can be a massive conversion booster.
Don't underestimate the power of this setup. A staggering 200 million Instagram users visit at least one business profile daily, turning idle scrolling into real shopping. This isn't just a feature; it's a direct pipeline to people who are actively looking to buy. For more stats on this, check out the latest social commerce insights from Inbeat.
Navigating the Account Review
After you’ve set everything up in Commerce Manager and linked your channels, you have to submit your shop for review. Meta needs to make sure your account, products, and business practices all line up with their Commerce Policies.
Want to get approved without a headache? Make sure your Instagram profile looks legitimate and trustworthy. That means a complete bio, a sharp profile picture, and a solid history of posts that show what your brand is all about. An empty or sketchy-looking account is a red flag and will almost certainly cause delays.
The review process usually takes a few days, so build that time into your launch plan. Once you get the green light, you’re officially ready to start building out your product catalog.
Populating and Managing Your Product Catalog
Alright, you've got the foundation of your shop built. Now for the fun part: filling it with products. Your product catalog is the literal engine of your Instagram Shop. It’s the digital inventory that fuels every single shoppable post, Story, and ad you'll run. Getting this part right is the difference between a shop that just exists and one that actually converts.
How you get your products into Commerce Manager really depends on the size of your inventory. There are basically two paths you can take, and your choice will have a big impact on your day-to-day workflow.
Choosing Your Catalog Upload Method
If you're running a boutique operation with a small, manageable number of products—let's say under 50 SKUs—manually adding items directly in Commerce Manager is a totally fine way to start. It gives you direct, hands-on control and is pretty straightforward for simple inventories.
But for most e-commerce brands, especially those with larger product lines or inventory that changes frequently, automation is the only sane path forward. The industry standard is to integrate your catalog using a certified e-commerce platform partner like Shopify or BigCommerce. This creates a live sync, meaning any update you make on your website—a price change, a new product drop, an out-of-stock item—automatically pushes to your Instagram catalog.
This isn't just a time-saver; it's a sanity-saver. It practically eliminates the risk of human error. If you really want to make sure your product listings are buttoned-up and optimized to perform across platforms like Instagram, you might even look into dedicated product feed optimisation services.
Key Takeaway: Manual entry can work for tiny shops, but syncing your e-commerce platform is the only scalable solution. It ensures your Instagram Shop is always a perfect mirror of your website's inventory, no constant manual updates required.
Detailing Your Product Information
It doesn't matter how you upload your products; each one needs a specific set of information to get approved and, more importantly, to actually entice customers. Vague or incomplete listings will get flat-out rejected by Meta and completely ignored by shoppers.
Here’s the bare minimum you need for every single item:
- High-Quality Images: Use clear, well-lit photos and videos. Don't just show the product on a white background—show it from multiple angles and, if you can, in a real-life context.
- Accurate Product Title: Be descriptive but keep it concise. "Men's Classic Cotton Crewneck T-Shirt" is infinitely better than just "T-Shirt."
- Compelling Description: Talk about the materials, the unique features, and the benefits. Use bullet points so people can scan the info easily on their phones.
- Correct Pricing: Make sure the price is an exact match to your website, right down to the currency code (e.g., USD, EUR).
- Website Link: This is non-negotiable. You need a direct link to the product page on your website for anyone checking out there.
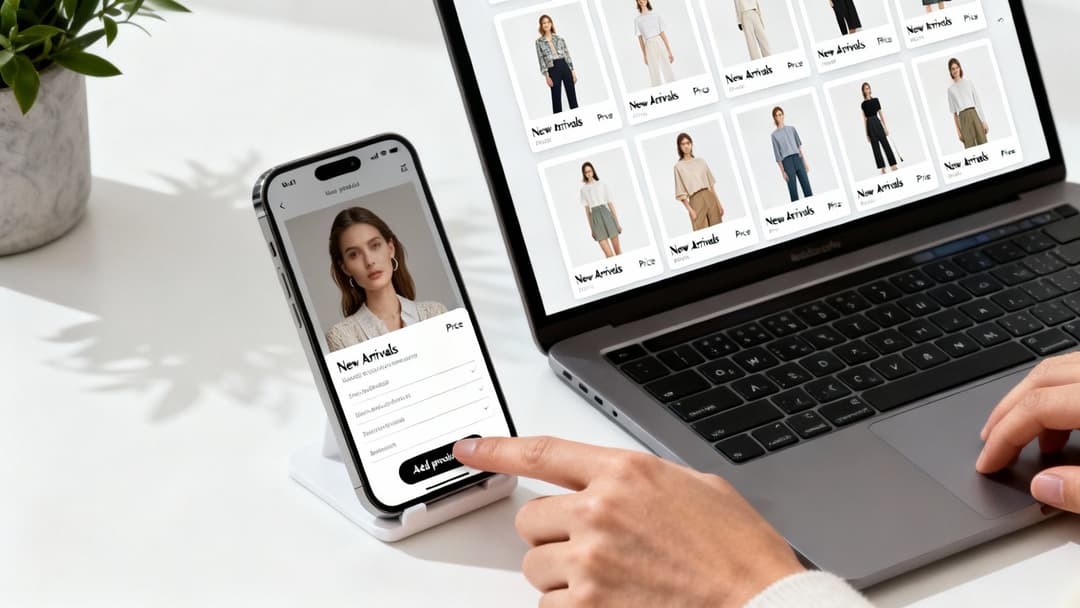
Curating Collections for a Better Shopping Experience
Once your products are loaded in, don't just dump them into a disorganized list. The magic happens when you organize them into collections (Meta calls them "sets" in Commerce Manager). This is how you transform a basic product feed into a curated, boutique-like storefront.
Put on your merchandiser hat and build collections that guide your customers through your catalog. A clothing brand, for example, could create collections like:
- New Arrivals: The first stop for your loyal followers.
- Best Sellers: Show off your most popular items to build instant social proof.
- Seasonal Picks: Think "Summer Essentials" or "Holiday Gift Guide."
- Gifts Under $50: Make it easy for shoppers to find budget-friendly options.
Well-curated collections make your shop feel less like a database and more like a discovery experience, which is exactly what you want on a platform like Instagram. For more tips on keeping your content in sync, check out our guide on how to post from Facebook to Instagram without the headache.
Launching and Activating Your Instagram Shop
You’ve got a fully stocked product catalog ready to go—now you're on the home stretch. This is where you flip the switch, translating all that backend work in Commerce Manager into a real, shoppable experience on your Instagram profile.
First, you’ll need to pass the final account review. After connecting your catalog, you submit your account for approval directly within the Instagram app. Meta's team will take a look to make sure everything, from your products to your profile, aligns with their Commerce Policies.
This usually takes a few business days, but I've seen it go faster. Having a complete, professional-looking profile with a clear bio, great content, and an established presence can definitely help your case. Once that approval notification hits your inbox, it's time to turn on the shopping features.
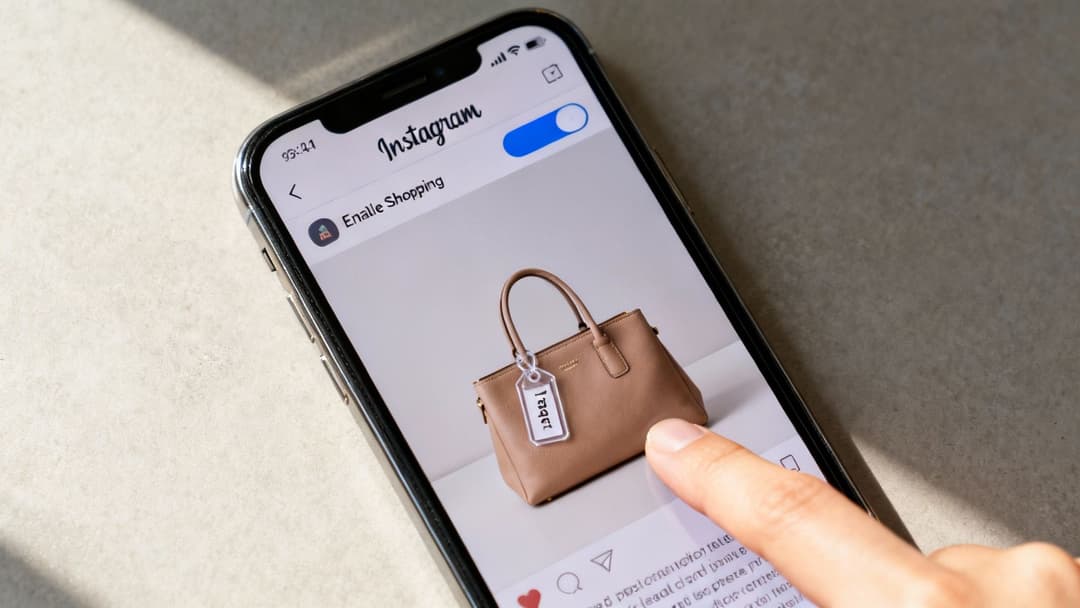
Activating Instagram Shopping
Getting approved doesn't mean your shop is live just yet. You have to manually activate it in your settings, a simple but critical step in learning how to set up a shop on instagram the right way.
Just head to your professional account settings and find the "Shopping" option. If it's not there, don't panic—sometimes it takes a little while to show up after approval. Tap into it, and you'll be prompted to connect the product catalog you built in Commerce Manager. Select it, and boom—you’re officially in business.
A "View Shop" button will now appear on your profile, giving visitors a direct path to browse your products and collections without ever leaving the app. This is a game-changer, turning your profile from a content feed into a powerful digital storefront. That direct access is huge, especially when you consider that 80% of users globally look for products or services on the platform. If you're curious about the potential here, check out these insightful Instagram shopping statistics.
Your Pre-Launch Checklist
Before you shout about your new shop from the digital rooftops, run through a quick final check. A few minutes of testing now can save you from customer frustration and lost sales later.
- Test Product Tags: Create a draft post and tag a few different products. Do the tags pull the correct item, price, and link?
- Verify Checkout Links: Click through on a tagged product. Does it actually go to the right product page on your site? Is the checkout process smooth?
- Review Your Shop Tab: Go to your profile and hit "View Shop." Make sure your collections are organized logically and that every product shows up with the right image and price.
A common mistake is just assuming everything will work perfectly from the get-go. Take five minutes to place a test order yourself. This one simple action can uncover any friction in the customer journey before your audience ever sees it.
Once you’ve confirmed everything is working, you're ready to plan your first official shoppable post. A great launch post isn't just about showing off a product; it’s about announcing this new, easier way for your followers to shop. You can even take your best organic content and scale it with paid ads, a process that becomes much easier once you understand what Facebook Ads Manager is and how it works with your new catalog.
Driving Sales with Advanced Shop Strategies
Getting your shop live is a huge first step, but the real growth starts when you treat it less like a static storefront and more like a dynamic marketing engine. Your product catalog isn't just a list of items; it's a goldmine of data you can plug straight into Meta Ads Manager to see some serious performance gains.
The magic really happens when you unleash Dynamic Product Ads (DPAs). These aren't your run-of-the-mill static ads. Instead, they’re smart ads that automatically show specific products to people who have already looked at them on your website or app.
Let's say someone browses a pair of sneakers on your site but gets distracted and leaves. DPAs can retarget that exact person on Instagram with an ad featuring those exact sneakers.
This kind of personalization is incredibly powerful because it’s timely, relevant, and cuts through generic brand messaging. You're responding directly to a user's behavior, which dramatically boosts the odds of them coming back to complete the purchase. If you're new to tracking these kinds of user actions, our guide on how to set up the Facebook Pixel is the perfect place to get started.
Scaling Your Campaigns with AI
While DPAs are a game-changer, trying to manage and optimize them at scale can quickly become a massive time sink. This is exactly where AI-powered advertising tools come in, completely changing how you create and manage campaigns. Forget A/B testing two or three ad variations—imagine testing hundreds at the same time.
Platforms like AdStellar are built to connect directly to your product catalog and Meta Ads account to automate this whole process. You can spin up hundreds of unique ad creatives from your best-selling products in minutes, not hours. The system then gets to work, testing countless combinations of copy, headlines, and audiences to rapidly pinpoint which ones deliver the highest return on ad spend (ROAS).
This data-driven approach takes all the guesswork out of scaling. Instead of relying on gut feelings, you’re using real-time performance data to pour your budget into proven winners, making sure every ad dollar works as hard as it possibly can.
From Manual Work to an Automated Growth Engine
When you connect your Instagram Shop to an AI advertising platform, you create a powerful, self-improving feedback loop. The system doesn't just launch your campaigns; it learns from them.
- Creative Generation: It can identify your top-performing products and automatically build fresh ad visuals and copy around them.
- Audience Testing: It rapidly cycles through different interest-based or lookalike audiences to find untapped pockets of new customers.
- Performance Optimization: As the data rolls in, the AI spots the high-performing ads and automatically shifts budget toward them, all while pausing the ones that aren't delivering.
This transforms your Instagram Shop from a simple sales channel into the heart of a data-driven customer acquisition machine. It’s about more than just knowing how to set up a shop; it’s about making that shop the foundation of your entire growth strategy.
Once you’re live, optimizing your product listings and overall strategy is key. For more ideas, check out these proven tactics to boost e-commerce sales. By pairing a well-managed catalog with intelligent automation, you'll find your winning ad combinations faster and scale your most profitable campaigns with confidence.
Have a Question About Your Instagram Shop? We’ve Got Answers.
Even when you follow the instructions perfectly, setting up an Instagram Shop can feel a bit like navigating a maze. Things pop up. Roadblocks appear. It’s all part of the process.
Knowing the solutions to common hurdles beforehand can save you a massive headache. Let’s walk through some of the most frequent questions and issues that brands run into.
"Why is My Shop Taking Forever to Get Approved?"
This is probably the number one question we hear. You’ve submitted everything, and now you’re just… waiting. After you hit submit, Meta's team has to manually review your shop to make sure your account, products, and business practices all line up with their Commerce Policies.
The official line is that this takes "a few business days," but honestly, there's no exact timeline. I’ve seen it take a day, and I’ve seen it take over a week.
Want to speed things up? Make sure your profile looks like a legitimate, trustworthy business. A complete bio, high-quality posts, and a history of regular activity tell Meta you’re the real deal. If you’re past the one-week mark, you can always check the status directly in your Commerce Manager.
Troubleshooting Product Tagging and Sync Issues
Another classic problem: your product tags just aren't working. You go to tag a product in a new post, and it’s nowhere to be found. What gives?
Nine times out of ten, this is a catalog sync issue, especially if you’re using an e-commerce platform integration like Shopify.
Your first stop should be Commerce Manager. Check for any errors flagged in your product feed. It’s pretty good at telling you what’s wrong—things like missing images, incorrect prices, or products that violate their policies. Fix those issues on your e-commerce site, force a new sync, and that usually does the trick.
Pro Tip: Remember that your initial shop approval and individual product reviews are two separate things. Every new product you add to your catalog also has to be reviewed. This can cause a small delay before it’s available to be tagged, so don't panic if it doesn't show up immediately.
Key Questions on Functionality and Strategy
Here are some other quick-fire questions that tend to pop up once you’re in the thick of it:
- Can I sell without a website? Yes, but only if you’re in the U.S. and eligible for Checkout on Instagram. This feature lets customers buy directly in the app. For everyone else, you’ll need to link out to your own e-commerce store to finalize the sale.
- Why isn't the "View Shop" button on my profile? This button only appears after your shop is approved and you have at least one approved product in your connected catalog. If you've met those conditions and it's still AWOL, a simple log-out and log-back-in often fixes it.
- Can anyone tag my products? By default, yes. But you can (and probably should) manage these permissions. Head into your settings to restrict product tagging to just your account or to approved business partners—perfect for influencer collaborations.
Ready to move beyond manual ad creation and start scaling your campaigns with precision? AdStellar AI connects to your catalog and automates the process of launching, testing, and optimizing hundreds of ad variations, helping you find your highest-performing combinations 10x faster. Learn more and see how it works at AdStellar.