If you're still relying only on the Meta Pixel, you’re navigating a storm with a broken compass. Seriously. The modern digital world is littered with obstacles that block or corrupt the data your browser sends back to Meta, leaving you with a fuzzy, incomplete picture of what’s actually working. This isn't just a minor headache—it's wasted ad spend and missed opportunities.
The Meta Conversions API (CAPI) is your fix. It’s a server-side tool that forges a direct, durable connection between your marketing data—from your website, your CRM, wherever—and Meta's systems. This bypasses all the browser-side chaos, like ad blockers and cookie restrictions, giving you far more accurate tracking, sharper ad optimization, and a much clearer view of your real campaign performance.
Why The Meta Conversions API Is Your New Secret Weapon
Think of CAPI as the definitive solution to the data problem. It operates from the security of your own server, creating a clean, direct pipeline to Meta that is completely immune to the interference happening on a user's browser.
Overcoming Modern Tracking Challenges
The biggest reason to get CAPI set up is its sheer resilience. It’s built to withstand the data loss scenarios that have been giving performance marketers migraines for years:
- iOS Updates: Apple's privacy crusade kneecapped browser-side tracking. CAPI doesn't care. It sends data from your server, which is completely unaffected.
- Ad Blockers: A huge chunk of users run ad blockers that stop the Meta Pixel dead in its tracks. CAPI operates entirely outside the browser, so it just works.
- Cookie Restrictions: Browsers like Safari and Firefox are waging a war on third-party cookies, making the Pixel less and less reliable. CAPI doesn’t need them.
This direct connection means your data flows securely from your server to Meta, completely sidestepping the browser-level disruptions that are costing you money.

This shift from browser to server isn't just a technical detail; it’s how you take back control of your attribution.
A Strategic Shift for Smarter Ad Spend
Getting CAPI in place is more than just a technical fix—it’s a strategic upgrade. When you feed Meta's algorithms cleaner, more complete data, you enable them to make much smarter decisions about who sees your ads and when. The result? Better campaign outcomes. Plain and simple. The robust data you can pipe through CAPI is also a goldmine for more advanced applications in Data Science.
Since its launch, CAPI adoption has exploded as advertisers see the real-world impact. Today, somewhere between 35% and 60% of active advertisers are pairing CAPI with the Pixel because they know they need reliable data to compete. For many, implementing CAPI drives a tangible 10–40% lift in measured conversions compared to just using the Pixel alone.
To spell it out, here’s a quick rundown of how the two stack up.
Meta Pixel vs. Conversions API At a Glance
The table below breaks down the fundamental differences between browser-side and server-side tracking. It's a clear illustration of why relying on the Pixel alone is no longer a viable strategy for serious advertisers.
| Feature | Meta Pixel (Browser-Side) | Meta Conversions API (Server-Side) |
|---|---|---|
| Data Source | User's browser | Your server (website, CRM, etc.) |
| Reliability | Vulnerable to ad blockers, cookie loss, and browser errors | Highly reliable; not affected by browser-side issues |
| Data Control | Limited; depends on browser policies | Full control over what data is sent and when |
| Offline Events | Cannot track offline events (e.g., phone sales, in-store purchases) | Can send a full range of offline and delayed conversion events |
| Customer Journey | Captures only a partial, online view | Provides a complete, end-to-end view of the customer journey |
As you can see, the Conversions API offers a far more robust and future-proof solution for data collection.
CAPI finally lets you capture the entire customer journey, not just the fragmented pieces a browser can see. This includes offline conversions, actions taken across different devices, and events that happen days or weeks after the initial ad click.
Ultimately, this complete picture leads to attribution you can actually trust. You can measure your ROAS and CPA with confidence, knowing the numbers reflect reality, not a browser's best guess. This move away from fragmented browser data to trustworthy server-side signals is no longer optional. It's absolutely critical for future-proofing your Meta advertising and unlocking better performance. For a deeper dive on this, check out our guide on the decline of third-party data.
Choosing Your CAPI Implementation Path
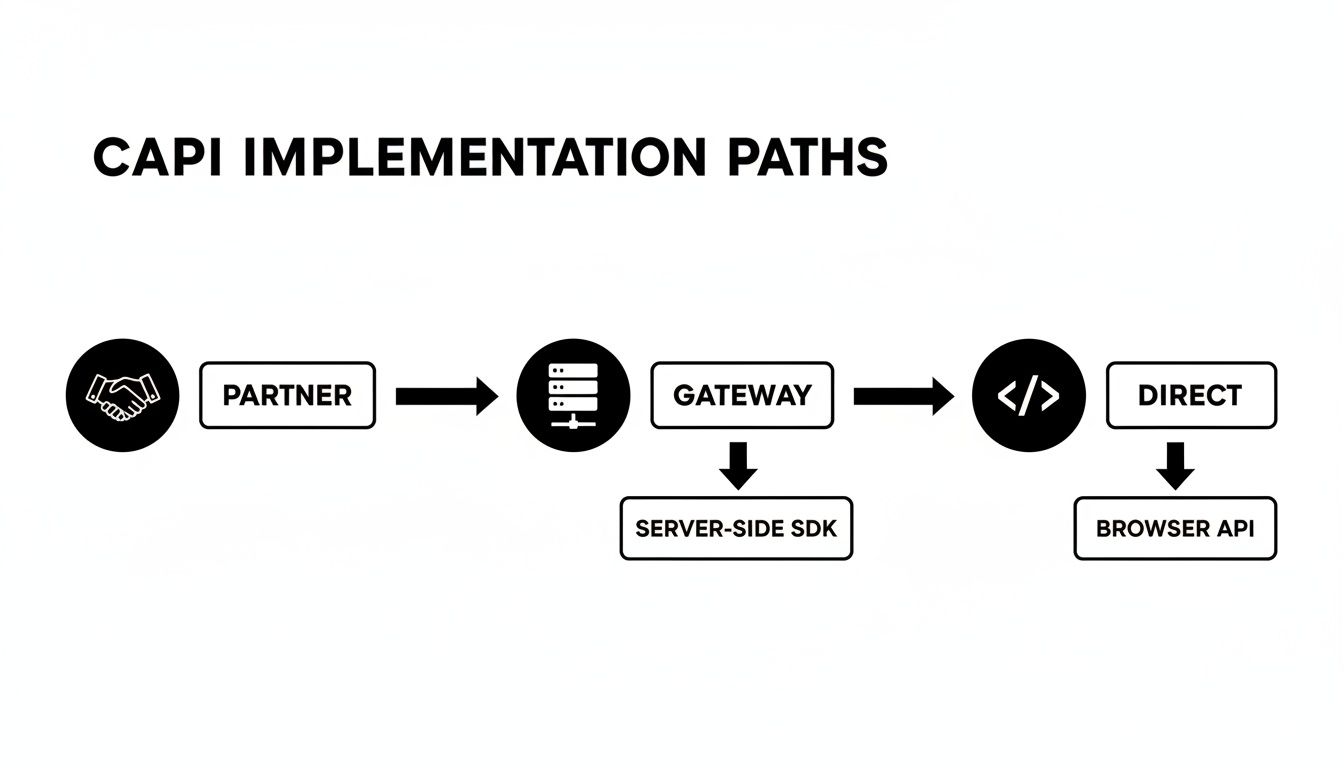
Getting started with the Meta Conversions API doesn't have to be a technical nightmare, but picking the right setup from the get-go is a make-or-break decision for your team. This choice directly shapes your setup time, ongoing costs, and just how much control you have over your data. There are three main routes you can take, each built for different business needs and technical resources.
The path you choose really comes down to your current tech stack, how comfortable your team is with code, and the level of customization you actually need. Let's walk through each option so you can make the right call.
Partner Integrations for a Guided Setup
For a lot of businesses, especially in e-commerce, a partner integration is the fastest and most direct path to getting CAPI up and running. Platforms like Shopify, WooCommerce, and BigCommerce have built-in or officially supported apps that do all the heavy lifting for you.
This is the way to go if you're after a low-code or no-code solution. The setup is usually a guided wizard: install an app, follow a few prompts to connect your Meta account, and tweak your settings. It's that simple.
- Pros: Requires minimal technical know-how, it's quick to get live, and you often get support from the platform provider.
- Cons: You get less customization, you're reliant on the platform's features, and some apps come with subscription fees.
As a real-world example, the Shopify integration can be live in under an hour. It will automatically start syncing standard events like ViewContent, AddToCart, and Purchase straight from your store’s backend to Meta’s servers.
The Conversions API Gateway for More Control
If you want more control than a partner integration offers but aren't quite ready for a full custom build, the Conversions API Gateway is your perfect middle ground. This is Meta's own solution, which you host in your own cloud environment, like Amazon Web Services (AWS).
Think of the CAPI Gateway as a smart bridge. It automatically scoops up events from your Meta Pixel, translates them into the right server-side format, and forwards them to Meta via CAPI. This approach helps you capture more conversions without forcing your developers to build a new data pipeline from scratch. If you're curious about how servers manage this kind of secure data transfer, check out our guide on what OAuth authentication is.
The CAPI Gateway is a powerful option for teams who want to own their data infrastructure. It offers a balance between ease of use and the robust data control that comes with a server-side setup, without the complexity of a direct API integration.
While Meta doesn't charge for the gateway software itself, you are on the hook for the cloud hosting costs, which will fluctuate based on your website traffic. The setup requires some technical comfort with cloud services, but it’s very well-documented.
Direct Integration for Full Customization
Finally, for businesses with dedicated developers and a need for absolute control, direct integration is the most powerful route. This involves your developers writing code to send event data directly from your server to the Conversions API endpoint.
This path gives you maximum flexibility. You can send any custom event imaginable, pull data from offline sources like your CRM, and have total ownership over the entire process. It’s the best choice for complex businesses that need to track a unique customer journey or blend multiple data sources together.
| Implementation Path | Best For | Technical Skill | Cost |
|---|---|---|---|
| Partner Integration | E-commerce stores, marketers without dev teams | Low (No-Code) | Low (App Fees) |
| CAPI Gateway | Teams wanting control without a full custom build | Medium (Cloud Services) | Medium (Hosting Fees) |
| Direct Integration | Businesses with dev teams and custom needs | High (Coding) | High (Dev Resources) |
Going with a direct integration means you're responsible for everything: generating unique event IDs, hashing customer data correctly, and maintaining the code over time. It’s definitely the most resource-intensive path, but it offers unparalleled data control and accuracy. For serious performance marketers, this is the ultimate solution for optimizing your Meta Conversions API results.
How to Set Up CAPI with Google Tag Manager
For most of us in the performance marketing world, Google Tag Manager is the command center for all website tracking. So, it’s no surprise that using it to implement the Meta Conversions API is a popular and powerful route. This approach gives you the best of both worlds: GTM's incredible flexibility and CAPI's rock-solid data reliability.
The magic behind this method is the server-side GTM container. Think of it this way: your standard GTM container runs in the user's browser, but the server container operates in a secure cloud environment that you control. This server acts as a trusted middleman, grabbing data from your browser-side GTM setup and then shooting it straight to Meta's servers.
As you can see, the server-side path—often powered by GTM—strikes a nice balance. It’s more robust than a simple partner integration but less technically demanding than building a direct API connection from scratch.
Building Your Server-Side Foundation
First things first: you need a server. Your initial move is to create a brand-new server-side container right inside your existing Google Tag Manager account. As you go through the setup, Google will guide you to provision a tagging server, which is usually handled through Google Cloud Platform (GCP).
I know, "provisioning a server" sounds like a job for an engineering team, but GCP has an automatic setup that does almost all the heavy lifting. For most businesses, a small, single-server configuration is plenty to get started and won't break the bank.
Once your tagging server is up and running, it’ll have a unique URL. This URL is your golden ticket—it's the exact address where you'll start sending all your website data.
Pro Tip: Don't stick with the default
appspot.comURL that Google Cloud gives you for your live setup. Map your tagging server to a custom subdomain of your own website, likegtm.yourdomain.com. This creates a first-party context, which makes your tracking far more durable against browser privacy updates.
Configuring Your GTM Clients and Tags
With the server container live, the real fun begins inside GTM. The goal is to get your browser-side container to talk to your new server-side container, which will then relay the message to Meta.
You'll be working with three main components to make this happen:
GA4 Tag (in your Web Container): You'll need to tweak your existing Google Analytics 4 tags. The goal is to have them send data not only to Google Analytics but also to your new server-side container. It's a simple change: just add your server container's URL to the
server_container_urlfield in your main GA4 Configuration tag.GA4 Client (in your Server Container): Inside the server container, you need something to "listen" for that incoming data. That's what a "Client" does. You'll add the built-in GA4 Client, which will automatically pick up any requests sent from your web container's GA4 tags.
Facebook Conversions API Tag (in your Server Container): This is the final piece of the puzzle. Head over to the Community Template Gallery and install the "Facebook Conversions API" tag. This tag is specifically built to take the data received by your GA4 Client and reformat it perfectly for the Meta Conversions API.
Mapping Events and Parameters
With the tag installed, it's time to tell it what to do. You're essentially mapping the event data coming from your website to the specific parameters Meta is looking for. If you've ever dealt with browser-side tracking, knowing how to set up the Facebook Pixel will give you a huge head start here, as the logic is very similar.
You’ll need to grab two critical pieces of information from your Meta Business Manager:
- Your Meta Pixel ID: This links all your server-side events back to the right ad account and pixel.
- A CAPI Access Token: This is basically a password that gives your server permission to send data. You can generate one in the Events Manager, under your Pixel's settings tab.
From there, you'll set up the tag to fire based on the events coming from the GA4 Client. For example, for a standard purchase event, you’d configure the CAPI tag to fire whenever the GA4 client sees an event named purchase. Then, you'll map the parameters—like value, currency, and content_ids—from the GA4 event data into their matching fields in the CAPI tag.
Once that's done, the flow is complete. A user buys something, the event fires to your server container, it gets processed securely, and then it's sent directly to Meta. You get the reliable conversion data you need to make smart decisions.
Mastering Event Deduplication and Data Hashing
If you're running the Meta Conversions API alongside the classic Pixel—and you absolutely should be—you've created the gold-standard setup. But this powerful duo comes with a catch. Without the right configuration, you’ll accidentally send every conversion event twice: once from the browser, once from the server. This leads to inflated numbers, confused optimization, and wasted ad spend.
This is exactly why event deduplication isn't just a feature; it's non-negotiable.
Deduplication is Meta's way of recognizing that the Purchase event from the browser and the Purchase event from the server are the exact same action. It intelligently merges them into one verified conversion, giving you the best of both worlds: the speed of the Pixel and the rock-solid reliability of CAPI.
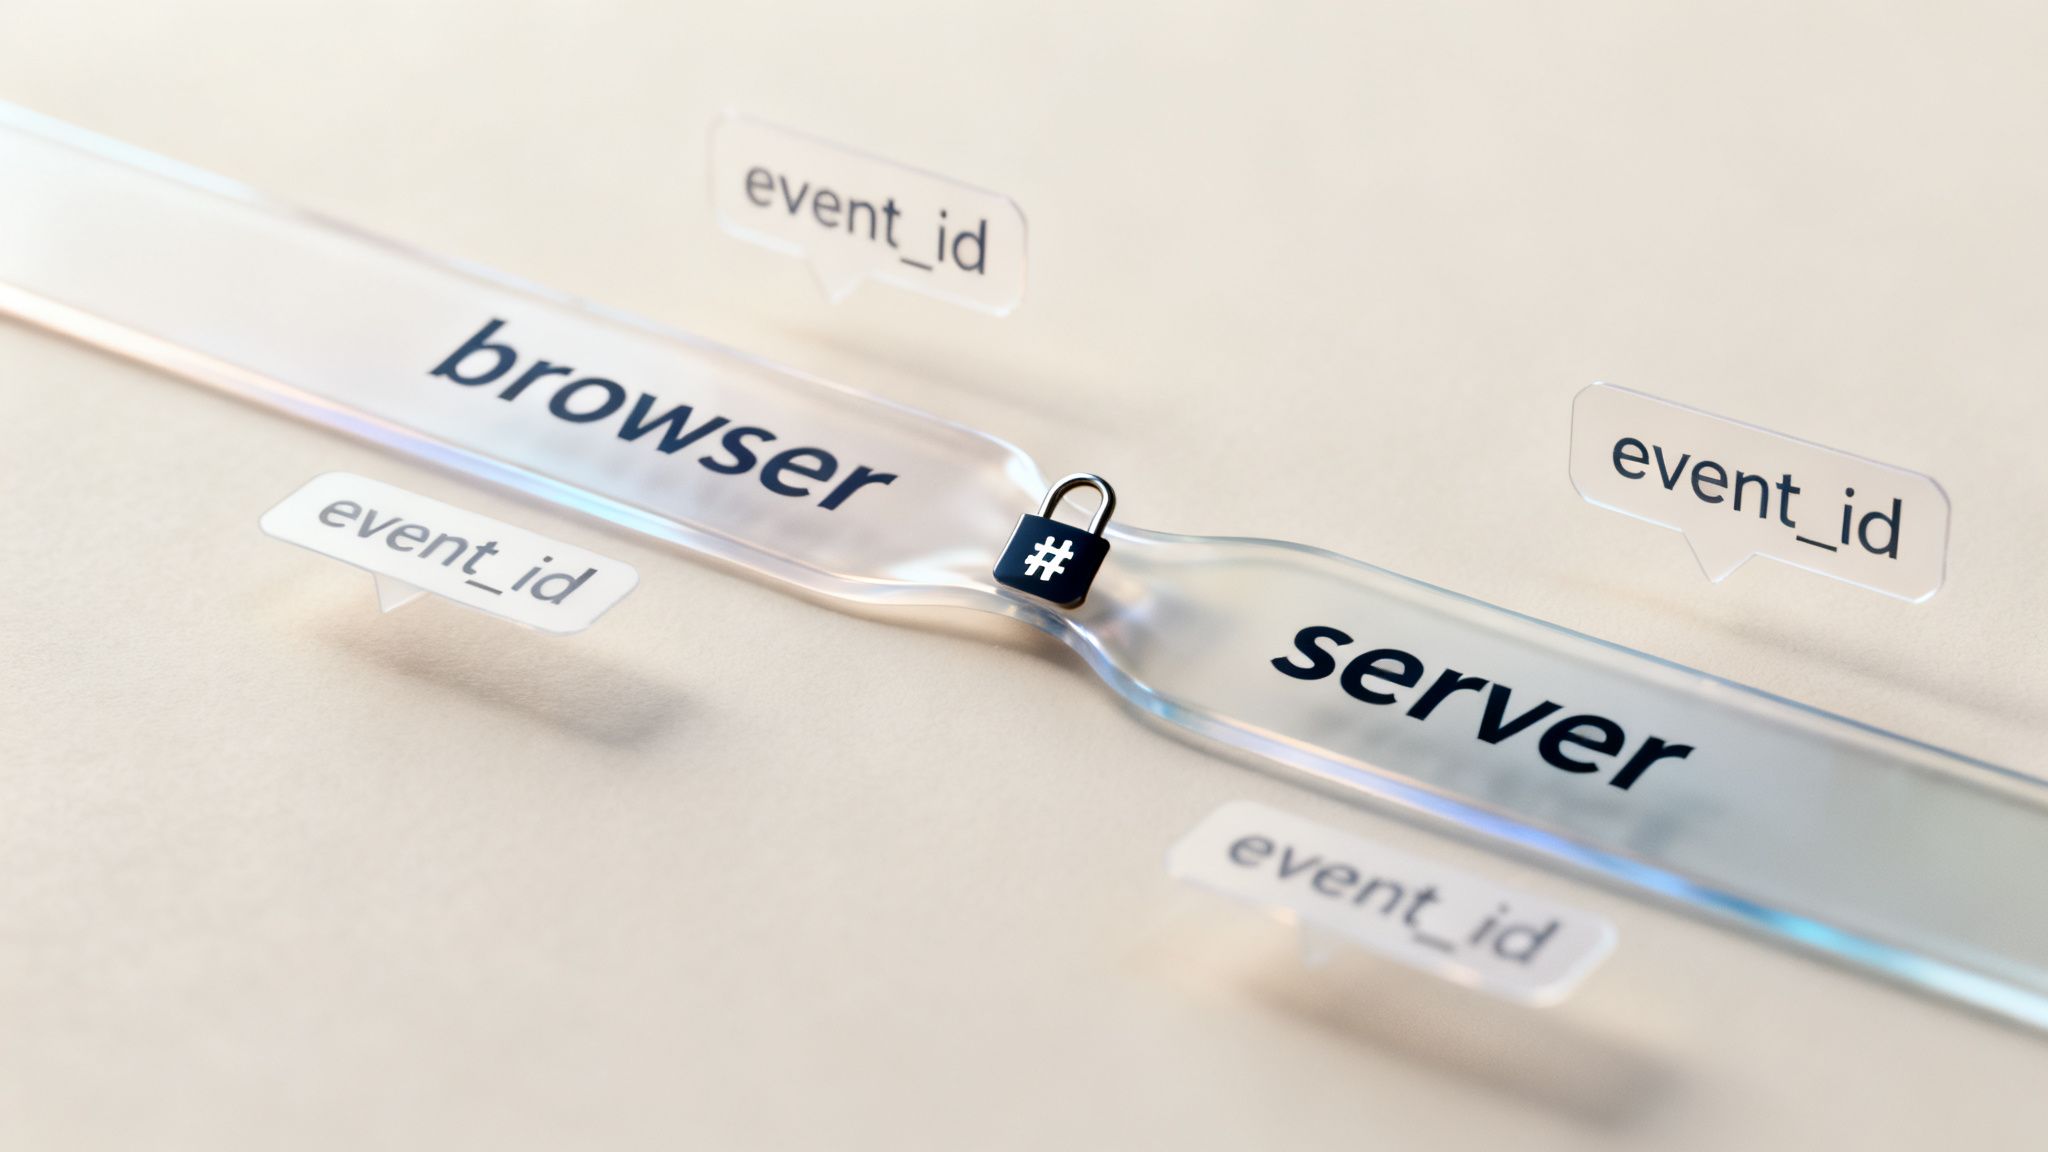
To make this magic happen, you have to give Meta a consistent signal. The most reliable way to do that? Generate a unique event_id for every single conversion a user takes.
The Critical Role of the Event ID
Think of the event_id as a digital fingerprint for a specific conversion. It's a unique string of characters you create the moment a user completes an action, whether that's submitting a lead form or finalizing a purchase.
The trick is to send the exact same event_id for that single action through both your Pixel and your CAPI setup. When Meta’s servers receive two events with matching IDs, they know to count them as one. Simple as that.
- For the Pixel (Browser-Side): The
event_idneeds to be generated and pushed into the data layer the moment the event fires. - For CAPI (Server-Side): That same
event_idmust be captured and sent along with the rest of your server-side payload.
For example, when a customer buys something, your system should generate an ID like tx_987654321. This exact ID gets passed to the browser-side Purchase event and the server-side one. Meta sees both, matches them up, and your attribution stays perfectly clean.
Without a unique
event_id, you're forcing Meta to rely on fuzzy, less precise signals like timestamps and browser IDs, which often fail. Implementing a consistentevent_idis the single most important thing you can do for accurate reporting in a hybrid setup.
The Power of Data Hashing for Match Quality
Beyond just preventing double-counting, the quality of your data is everything. The Meta Conversions API works best when it can accurately link your server-side events back to real user profiles. This is measured by your Event Match Quality (EMQ) score, and the secret to a high score is providing rich customer information.
Of course, sending raw personal data like emails and phone numbers across the web is a massive privacy red flag. That’s why hashing is a mandatory step. Hashing is a one-way process that scrambles personally identifiable information (PII) into a secure, irreversible string of characters using an algorithm like SHA-256.
You're not sending the actual data, just a secure fingerprint of it.
- Original Email:
jane.doe@example.com - SHA-256 Hashed Email:
f7c3bc1d...(a long, unique string)
Meta can then match this hashed value against its own database of hashed user info without ever laying eyes on the original PII.
Boosting Your Event Match Quality Score
To get your EMQ score as high as possible, you need to hash and send as many customer parameters as you can reliably collect. Meta gives more weight to certain fields that have the biggest impact on matching. Knowing what they are can help you structure your data payloads for maximum impact. A good grasp of Facebook event dimensions is a huge help here.
| Parameter Priority | Customer Information Fields | Why It's Important |
|---|---|---|
| High | Email (em), Phone (ph), Click ID (fbc) |
These are the heavy hitters. They are highly unique identifiers that provide the strongest possible signal for matching a server event to a Meta user profile. |
| Medium | First Name, Last Name, City, State, ZIP | Adding these demographic details provides more context and dramatically increases the probability of a successful match, especially when high-priority fields aren't available. |
| Low | Browser ID (fbp), IP Address |
These are less stable but still useful. Think of them as helpful filler that can close the gap when higher-priority data is missing. |
By diligently implementing event deduplication with a unique event_id and securely hashing customer data, you turn the Meta Conversions API from a simple tracking tool into a powerful engine for accurate attribution and smarter ad optimization.
How to Test Your Setup and Measure the Impact
Alright, you’ve done the heavy lifting and got your Meta Conversions API pipeline built. But launching it without testing is like flying blind. You need to be absolutely sure every signal is being sent, received, and processed exactly as you intended. This isn't just a technical check; it's about validating the entire effort and setting the stage to prove its ROI.
Your first stop is always going to be Meta's Events Manager. Think of it as your command center for all things CAPI. This is where you'll get confirmation that your server events are landing correctly and, just as importantly, being properly deduplicated against the signals coming from the browser pixel.
Using the Test Events Tool
Meta’s Test Events tool is your best friend here. It's a real-time feed of every event hitting your pixel, whether it’s from a browser or your server. Honestly, you can't properly diagnose an implementation without it.
To get started, head into your Events Manager, pick your Pixel, and click on the "Test Events" tab. Meta will generate a unique Test ID for you. You need to include this ID with your server-side events so they show up in this special diagnostic view.
Once you start sending test traffic, you should see events popping up in the log almost instantly. Here’s exactly what you’re looking for:
- Both Events Arrive: For a single user action, like a purchase, you should see two entries: one tagged "Browser" and another tagged "Server."
- Deduplication is Successful: The magic happens when the server event is marked as "Processed" and the browser event is tagged as "Deduplicated." This is your proof that the
event_idis matching perfectly. - Event Parameters are Correct: Don't just skim the surface. Click into each event and inspect the data payload. Are the
valueandcurrencycorrect? Is all the customer information you intended to send actually there?
If you're using Google Tag Manager for your CAPI setup, you'll often find yourself debugging client-side scripts and data layers. This is where your browser’s developer tools, like the Safari browser console, become indispensable for checking JavaScript and network requests.
A common pitfall: Seeing events processed but with a dismal Event Match Quality score. If you see a score below 6, that’s a red flag. It usually means your data hashing is off or you're not sending enough customer parameters to create a reliable match.
Measuring the Business Impact
Getting the technical side right is one thing, but the real win is seeing a tangible impact on your campaign performance. The whole point of CAPI is to feed Meta's algorithms cleaner, more complete data, which should translate directly into better business outcomes.
In a world of disappearing cookies and tracking restrictions, CAPI is the new foundation for reliable measurement. Marketers who implement it properly often report 10–40% more conversions, simply because server-side events capture what the pixel misses due to ad blockers and iOS privacy settings. This precision allows Meta's AI to work with better historical data, leading to smarter optimizations. In fact, AI-powered bidding, supercharged with clean CAPI signals, has been shown to deliver a 27% higher ROAS compared to manual methods.
To prove this for your own account, you need a clear "before and after" picture. Establish a baseline for performance before you flick the switch on CAPI, then compare it to the results a few weeks after it's been running.
Key Metrics to Monitor Post-CAPI Implementation
Here’s a quick rundown of the key performance indicators you'll want to track to truly quantify the impact of your Conversions API implementation.
| Metric | What to Look For | Why It Matters |
|---|---|---|
| Attributed Conversions | A noticeable lift in the total number of conversions reported in Ads Manager. | This is the most direct sign that CAPI is successfully capturing events the Pixel was missing. |
| Cost Per Acquisition (CPA) | A decrease in your CPA for conversion-focused campaigns. | More accurate conversion data helps Meta's algorithm optimize delivery more efficiently, finding cheaper conversions. |
| Return on Ad Spend (ROAS) | An increase in your reported ROAS. | Better attribution gives you a clearer picture of the true revenue from your ads, often revealing higher performance. |
| Event Match Quality Score | A consistent score of 7 or higher. | This score directly impacts how effectively Meta matches server events to users, which is critical for optimization. |
By keeping a close eye on these metrics, you can build a rock-solid business case for your server-side tracking efforts. You won't just have a more resilient ad setup; you'll have the numbers to prove its value. For a deeper look at interpreting these results, check out our guide on marketing campaign analytics.
Still Have Questions About CAPI?
Even with the clearest instructions, jumping into something as technical as the Meta Conversions API can bring up a few last-minute questions. It's totally normal. I'm going to run through the most common ones we hear from performance marketers just like you.
Think of this as your final pre-flight check. We'll clear up any lingering confusion about cost, technical needs, and how CAPI plays with your existing setup so you can move forward without any second-guessing.
Is the Meta Conversions API Actually Free to Use?
Yes, the API itself is 100% free. Meta doesn't charge a dime for you to send them data through this channel. But—and this is a big but—that doesn’t mean it has zero cost.
The real costs are tied to how you decide to implement it. Here's the breakdown:
- Partner Integrations: Using a pre-built app, like one from the Shopify app store, might involve a one-time purchase or a monthly subscription fee. You're paying for the convenience.
- CAPI Gateway or GTM Server-Side: Choosing either of these routes means you’ll be on the hook for cloud hosting fees from a provider like Google Cloud or AWS. The cost scales with your website traffic, but it's often more affordable than you'd think.
- Direct Integration: The main "cost" here is your developers' time. Building and maintaining a custom pipeline requires a significant investment in engineering resources.
So, while the API is free, you definitely need to budget for the infrastructure or software required to get it up and running.
Do I Still Need the Meta Pixel After Setting Up CAPI?
Yes, absolutely. This is probably the biggest point of confusion I see. Let me be clear: CAPI is not a replacement for the Pixel. It’s a powerful teammate. The gold standard is running both in a hybrid setup.
The Pixel is your frontline scout—it's incredibly fast at capturing browser-level actions that fuel real-time ad optimization. But it’s not perfect. CAPI is your reliable ground support, filling in all the gaps the Pixel misses because of ad blockers, cookie restrictions, and iOS updates.
By running them together and setting up deduplication correctly, you create the most accurate, resilient, and complete data set possible. This is exactly what Meta’s algorithm needs to find your best customers and drive peak performance.
Don’t pick one over the other. You need both to win.
What's the Difference Between CAPI Gateway and a Direct Integration?
Great question. This choice really comes down to control versus convenience. Both are excellent server-side solutions, but they're built for different teams with different resources.
The Conversions API Gateway is Meta’s own ready-made solution that you host on your own cloud server. Think of it as a bridge. It’s designed to automatically listen for your Pixel events and then securely send them to Meta from your server. It's a fantastic middle-ground—you get the reliability of server-side tracking without asking your dev team to build a custom data pipeline from scratch.
A direct integration, on the other hand, is a full custom build. Your developers write their own code to send event data directly from your server, CRM, or backend systems to Meta's API endpoint. This route offers maximum control and flexibility, allowing you to send unique offline events or custom data points that the Pixel could never see. It's the most powerful option, but also the most resource-intensive.
| Feature | CAPI Gateway | Direct Integration |
|---|---|---|
| Setup Complexity | Medium (Requires cloud server know-how) | High (Requires custom dev work) |
| Flexibility | Good (Mirrors and protects your web events) | Maximum (Send any event, online or offline) |
| Best For | Teams wanting more control without a full custom build. | Businesses with unique data needs and dev resources. |
There's no single "best" answer. The right choice depends entirely on your team's technical skills and what you're trying to achieve with your tracking.
Ready to stop guessing and start scaling? AdStellar AI automates your Meta ad creation and uses AI to identify your top-performing creative and audience combinations. Launch hundreds of ad variations in minutes and let our platform pinpoint the winners that drive real ROAS. Discover how AdStellar AI can transform your Meta campaigns today.